• Home  Sunkey Fusion  SunDriver  Sunkey  D2SUN  SunDisk  Download  Distributors  Review  Disclaimer  GENUINE  DIY


  SunDriver Review Collection     >>> More review please check here <<<
 
By: Dark Mod

Good day to everyone here at wiinewz.

First off, I want to say Happy New year to everyone and hope you enjoy it to the fullest.

Anyhow, i’ve made three vids and took some pics of the sundriver and my wii.


http://www.youtube.com/watch?v=BYgi8atUyX4


http://www.youtube.com/watch?v=WlIHDwQSNC0


http://www.youtube.com/watch?v=3ZO3wAIzmhI


And here are the pics:


Ok....here it goes.

Packaging wise: As usual this is my favourite....simple and effective; I love how the little screwdriver, screws and cable fits so snug in the sundriver’s case. I also love how it is packaged in such a way that you can pre-install a harddrive to sell for your customers......great job on that D2sun.

Engineering wise: All I can say is WOW......the red PCB is so simple, with the legendary actel 3 chip the spi in the corner and underneath, the HDD controller and what not....thumbs up to that.

Installation wise: the install of the harddrive is very easy, just angle it and slide in the port and screw the side with the two necessary screws and the installation of it to the wii is just like putting back the wii drive in.....nothing fancy, anyone can do it, I literally let my seven year old cousin install the sundriver for me while I was downloading the menu software.....lol.
The only tiny setback she had was the aligning of the USB and switches to the front slot, as it was bend. Need to correct that issue D2sun I used some nylon washers to align it properly and she fit beautifully.

Operation wise: well thanks to some of the guys who found a way how to get the sundriver to run properly using the GCOS loader....I want to say big thanks to all of you.

Here is how I set it up for it to run for the first time.

All four switches set on the right-hand side facing the eject button.

Power on wii.

Set the USB to PC and run sundriver app.

Set wii mode and follow instructions.

Click on upgrade menu program and load the GCOS.

Load games using the app (takes 3 mins for GC, 5mins for single layer wii games and 15 for DL)

To power up using the GCOS loader, power on wii normal.

It will automatically load the GCOS on the disc channel, load the GCOS and just use the reset to choose title and eject to launch it for your game to play.

It will reset and then go through the procedure with health screen and what not.

And then play.

To come off the game, quit the software and on the disc channel the game will still be launched.
Power cycle the wii.

You will see the game in the disc channel again. Just press eject and the game will eject and the GCOS will load after.....It’s that simple.

Testing of the games:

Well so far, wiisports, wiisports resort, NSMB, SSBB, Mario galaxy, and all the troublesome titles worked great, loads super fast and no hiccups at all.

Still need to find my gamecube titles including that game that is claimed to release bug codes instead of the game....I wanna get my hands on it badly.

My copy of the NSMB is a raw, clean unpatched version of the game, I wanted my wii to run clean backups and no homebrew and no gecko OS so all of my titles run great.

SSBB is also a raw version of the double layer, runs beautiful, nice and fast and really smooth....I love it.

Technical wise: My favourite part.......now garyopa made a statement the other day about the SATA version of the sundriver claiming that the 3.5 version uses a certain amount of amperages and voltages to power up which leads to component breakdown and therefore messes up the 5 volt circuit, i’m still doing test on that one, but what i’ve seen so far, this Modchip called D2Ckey, for a 20X wire Modchip, that chip sucks alot of voltage for start-up and therefore raises the components in the voltage circuit but don’t kill it.....so as a precaution for anyone who wants to use the big HDD for their wii’s sundriver, use one that is below 7000RPM, not above cause that one kills the wii circuitry.

But other than that, she works great, my cousin is still playing NSM on the wii for the past 8 hours and both game and sundriver is handling it very well without any problems.

SATA version of the test will be out next week so I can’t wait to test her as well.

But once again, thank you D2sun and the members and staff of wiinewz for reading this review and I’ll like to thank my cousin for helping me out with testing the device and I’ll like to thank Gothtech for the 30gb IDE HDD.....you the best bro. Can’t wait to test any other prototype you unleash for the public once again D2sun.

Thank you.
Dark Mod from Modz Inc.
 

By: TheForce81

OK, so here is my review!

This arrived today!


All in perfect order, looks very good, but I am used to nothing else from D2Sun to be honest. After this obvious part, here are some more interesting details, the way the drive gets placed and connected it perfect! No room for it to move around, there is a little opening so you can push the drive in gently.


Installing it into the Wii is very easy, the spot where you would find the DVD-ROM drive is now used to place this piece of equipment. Though this means you loose the drive altogether, it makes up for one tidy and solid installation! It is one with the Wii and to be honest, who needs the dvd drive if you can use a harddrive with all games on it anyway? I know I am done with that!


Now I tested the Sundriver before screwing it back together, when using a no name brand adaptor the Wii didn't start when trying to power it up, but when I used a Nintendo original adaptor it powered up perfectly fine! This shows how big differences in quality of adaptors can be, bad power supplies can hurt the equipemnt you power it with, so it is wise to always use Nintendo original power supplies with your Wii's, modded or unmodded! OK, back to business, when powered up and connected to the PC, the Sundriver application finds it and uploads games like advertised. Takes about 4 minutes per full Wii game and about 1.5 minute per GameCube game.

Now I connected it to the TV and tested some Wii games: Mario Party 8, Super Paper Mario, New Super Mario Bros. and Zelda Twilight Princess, all worked flawlessl, quiet and FAST! Wow, loading has never been this fast and quiet! I like that about this way of modding.
Next I tested a few GameCube games: Super Mario Sunshine, Zelda the Windwaker, Wario World, Star Wars Rogue Leader and Zelda Collector's edition. All played flawlessly, but for Zelda Collector's edition, when trying to start any of the games, it goes in some kind of debug mode. I am sure this will be possible to solve with a firmware upgrade, knowing D2Sun though!

After all the testing I closed up the Wii and this is the result!

Using the eject button to power up the Wii, using the reset button to select a game and using the eject button again to confirm the game selection works very easy and intuitive.

Some minor critical notes:
- when programming games you have to program them one for one, it would be VERY helpful if you could make a list and program that list, saves a lot of time and would be very convenient.
- when programming a game into a slot where there is already a game programmed to by accident, you do not get a confirmation button and the former game is gone. A confirmation button would be very welcome for slots that already contain a game.
- sorting games is only done by slot number, it would be very convenient if this could be user selectable through the Sundriver application.
- I believe all of the former points can be solved by updating the menu/firmware, the next one can't: the USB port is fitted a bit too low and because of that it lightly pushes on the front lid of the Wii, not a big deal, but it should be possible to solve in the next batch of production I think.

My personal conclusion about this product is the following: SUPER product! I will not use DVD discs anymore now! This way is so much more convenient, no more sifting through discs which take a lot of space or become scratched, very quiet and fast operation! Thanks for this very nice product again D2Sun! 
 

By: Idone
Sun Driver (sata version) arrives!! Very nice and simple retail packaging and a couple hdd's ready to be tested


Installation is very simple (no harder than replacing the drive) 
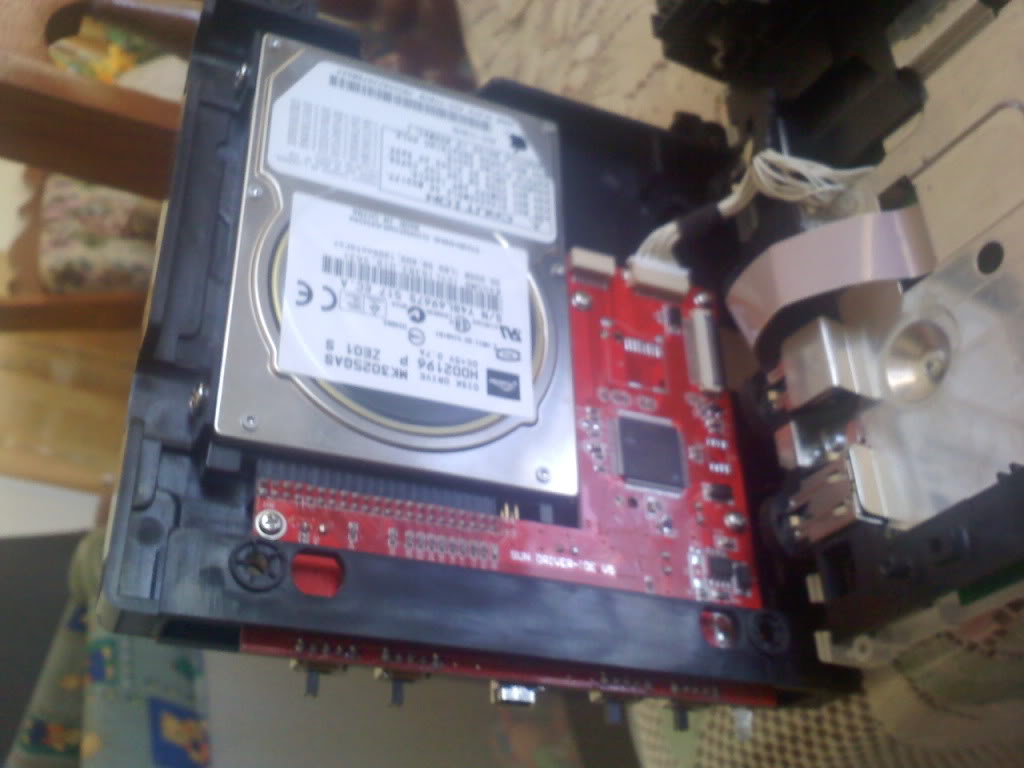
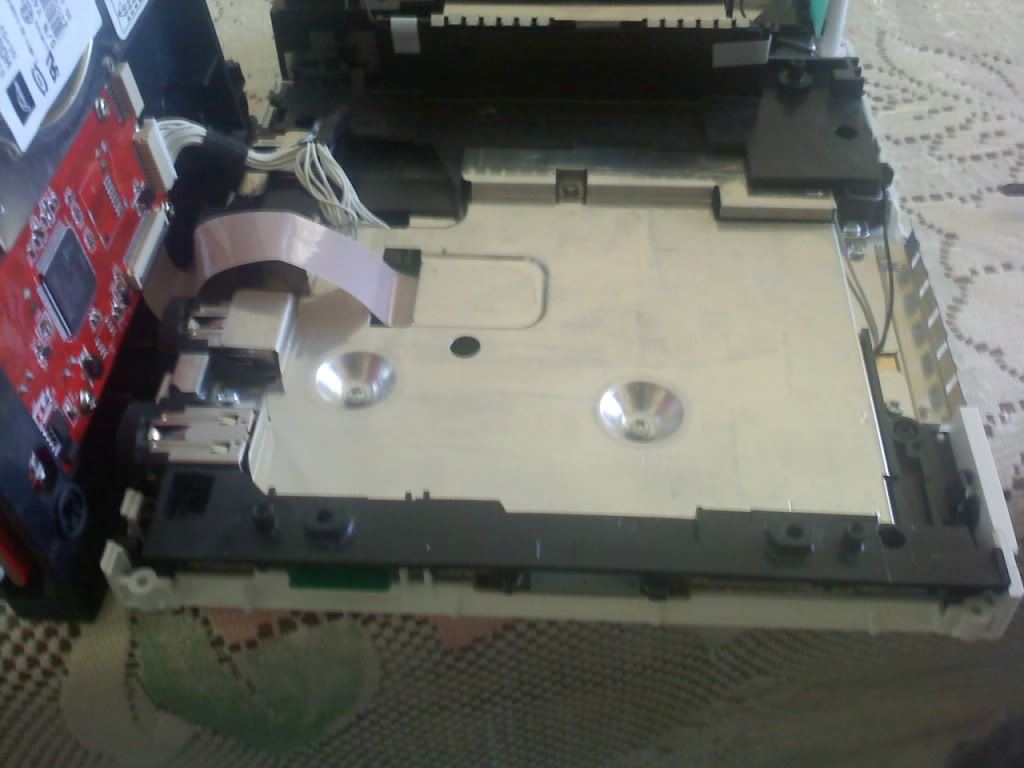
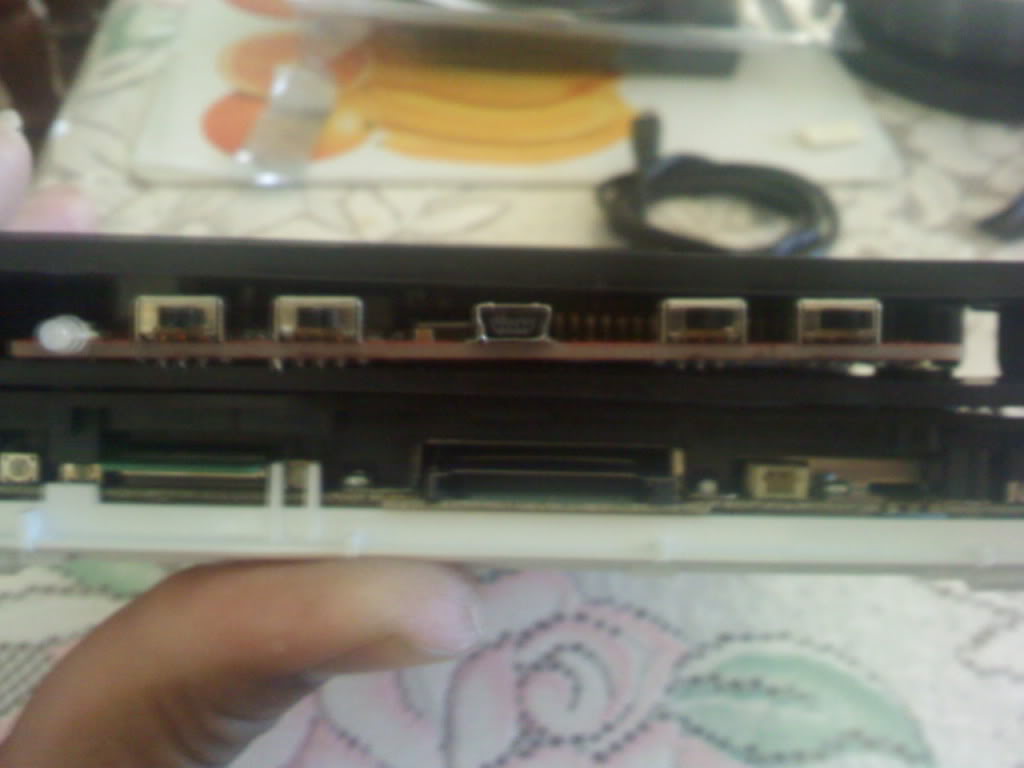
The fit for power, flat cable and sata data/power are all very solid (sata connections are especially tight which is nice because I've some cheap sata connectors on other devices where the cable can fall out if bumped)


2.5in hdd fit's nicely as expected. The tight power/data connection and 2 mounting screws are more than enough to keep the hdd in place and secure.


A good look over Sun Drivers PCB shows of the quality from manufacturing.. all connections, components, etc are clean and there is no slop left over or bad solder here!


NOTE: (Sun Driver may come shipped to you with switches all set to "ON" please REMEMBER switch them all away from led -> to take advantage of the GC "SunDiskMenu01.ISO" to switch games)


Some sexy photo's of Sun Driver's led showing status. Old face plate mod for SunDisk .. will probably do some nice mod for Sun Driver soon also


Installing games and configuring Sun Driver is easy and fast.


Power on Wii with "Eject" button and 4 switches to the right and GC Menu app comes right up!


GC Menu is nice and simple select the game you want and Wii reboots with selected game loaded into disc channel


I found this product easy to use and with 3 way to change games it is very convenient way to store and play your games.

Upon first connecting the usb data cable to pc drivers were automatically found and installed, SunDriver_Programmer_V2.0.exe worked as expected and loaded games quick.

All tested drives worked except:
Western Digital model: WD2500JD-22HBB0 (250gb 3.5in hdd)
I was able to install game images and game cube icon even show for SunDiscMenu but trying to run it only ever rebooted the wii. I spent hours trying to make this drive work but with no success.

Problem games? Well Mario Party8 isn't working for me but i have not done any troubleshooting for it yet, and it's not a 1:1 backup so I can't say with any certainty that it's good.

So over all quality, value, ease of use, and products design innovation for it to completely replace your dvd drive make it an obvious and wonderful option for those looking into drive mods. Also I can't speak for everyone, but thinking over the years at how many optical drives have failed me compared to hard disc drives and HDD's always seem to last longer.

Final thoughts?... Having tried many of the current solutions on the market this one is by far my favorite so far.


By: Davide

Recensione SunDriver IDE+CF e SATA


Immagine Postata


Sito ufficiale


Indice


  • Introduzione

  • Contenuto della confezione

  • Installazione

  • Istruzioni d'uso

  • Test

  • Conclusione

1 - INTRODUZIONE


Lo staff di NextRL ed io siamo lieti di presentarvi in esclusiva italiana la recensione dei 2 nuovi chip prodotti dal Team D2SUN, il Sundriver IDE+CF ed il SunDriver SATA.
SunDriver è una nova serie di chip innovativi che sarà presto disponibile presso i vari store online.
Noi con buon anticipo rispetto all'uscita sul mercato europeo siamo riusciti a mettere le mani su entrambe i modelli.

Il punto di forza di questi chip è la capacità di avviare i giochi direttamente da hard disk, cosa già possibile da parecchi mesi per mezzo degli usbloader.
Ma a differenza di questi ultimi il SunDriver è in grado di avviare da hard disk anche i giochi GameCube e il tutto senza pericolo di brick.

In sostanza il SunDriver rimpiazza il lettore DVD e lo emula completamente accedendo ai dati sull'hard disk collegato via interfaccia IDE o SATA a seconda del modello.
In particolare il SunDriver IDE+CF supporta le CompactFlash in alternativa agli hard disk IDE.

Ovviamente come i chip della generazione precedente anche il SunDriver non necessita di saldature.

Ecco la lista delle specifiche finali tradotte dal sito del produttore.

  • supporta la recente protezione BCA introdotta con New Super Mario Bros.
  • plug and play, 100% solderless (niente saldature)
  • tecnologia A.I. Boot per il rilevamento automatico della regione; supporta tutte le regioni JAP/USA/KOR/EUR
  • supporta tutte le Wii, vecchie e nuove compreso il recente lettore D3-2 e l'ultimo aggiornamento Wii 4.2x
  • supporta i giochi normali (DVD5) e double layer (DVD9)
  • supporta le applicazioni homebrew
  • supporta i giochi GameCube
  • supporta tutti i giochi Wii della stessa regione
  • supporta in parte i giochi Wii di regione diversa
  • aggiornamento del chip via USB
  • switch esterni di configurazione per cambiare le impostazioni del chip senza dover mai più aprire la Wii
  • supporta l'uso del PC per selezionare i giochi via USB
  • Applicazione Nintendo Game Cube che funge da GUI come menu di selezione giochi tramite il joypad GC o i tasti RESET e EJECT della Wii
  • velocità di lettura superiore a 8x
  • supporta hard disk IDE e CF memory media, o hard disk SATA fino a 2000GByte per un massimo di 424 giochi in tutto
  • trasferimento dati ad alta velocità via USB 2.0; trsferisce un iso DVD5 in appena 3:30~5:00 minuti
2 - CONTENUTO DELLA CONFEZIONE


Ecco come si presenta la confezione.
A sinistra c'è il SunDriver IDE+CF a destra il SunDriver SATA.
Il cavo in alto è la prolunga SATA per gli hard disk da 3.5" che per questioni di spazio non possono essere installati dentro la Wii. Questo cavo è opzionale ma all'occorrenza può essere acquistato a parte.
Che io sappia gli hard disk IDE da 3.5" non sono supportati in via ufficiale.

Immagine PostataImmagine Postata

Dentro la confezione troviamo:

  • 1 chip alloggiato dentro la sua vaschetta che ricalca la sagoma del lettore.
  • 2 viti per fissare l'hard disk alla vaschetta
  • 1 cacciavite (non è un triwing quindi da solo non basta per aprire la console)
  • 1 cavo USB -> MiniUSB
  • 1 cavo flat per il programmer jtag, il Nero Dual Programmer che potete opzionalmente comprare a parte


Immagine Postata
3 - INSTALLAZIONE


I chip SunDriver sono veramente semplici da installare, un'operazione alla portata di tutti.
Paradossalmente è più semplice collegare il sundriver che smontare la console, se non sapete come aprirla seguite questa guida.

Ecco alcune immagini relative al processo di installazione.
Come potete notare è sufficiente collegare il chip al flat e all'alimentazione provenienti dalla wii.
Il lungo cavetto flat che fuoriesce dal chip è il cavo di programmazione jtag che si può far comodamente uscire da una delle due porte di memoria GameCube.
Quando il flat jtag non viene utilizzato può essere ripiegato all'interno della porta stessa.

Immagine PostataImmagine PostataImmagine Postata

Una volta rimontato il case e il frontalino della wii, questo è il risultato finale. Il cavo usb è necessario solo durante il trasferimento dei giochi sull'hard disk e in fase di configurazione.

Immagine Postata


Poichè il connettore per la CompactFlash è piuttosto nascosto riporto un'immagine che mostra come collegarla al SunDriver IDE+CF.

Immagine Postata

NOTA
A parte la connessione col dispositivo di massa specifico (IDE, SATA o CF) il procedimento per l'installazione non cambia.

4 - ISTRUZIONI D'USO


Ad oggi non esiste ancora un manuale utente, ma sarà presto disponibile sul sito ufficiale.

Si ringrazia GMODZ per il valido video-tutorial che in mancanza di un manuale risulta davvero prezioso.


Il video mostra oltre all'installazione anche la configurazione del chip ed il traferimento delle iso sull'hard disk.
In particolare potete scaricare dalla sezione download del sito ufficiale sia l'applicazione SunDriver APP che l'iso del menù di selezione giochi.
Sempre nell'area download è disponibile un aggiornamento per il SunDriver IDE+CF, ma non è detto che ne abbiate bisogno perchè i chip immessi sul mercato dovrebbero già includere tale aggiornamento (magari prima di procedere all'acquisto verificate col rivenditore, altrimenti dovrete comprare anche il Nero Dual Programmer per installare l'aggiornamento).


L'applicazione SunDriver APP

Per trasferire i giochi su hard disk occorre collegare il chip via usb al pc ed avviare l'applicazione SunDriver APP.
Dopo di che premete il tasto "SELECT", scegliete l'iso di vostro interesse, selezionate lo slot (bank) in cui trasferirla e premete il tasto "PC -> SunDriver".
Nel volgere di 4-8 minuti (il tempo dipende anche dalla velocità di rotazione del disco) il trasferimento è terminato e il gioco è pronto per essere lanciato.

Immagine Postata


Tra le altre cose l'applicazione SunDriver APP permette anche di ritrasferire le iso dall'hard disk al computer utilizzando il tasto "SunDriver -> PC".


Il menù di selezione dei giochi (GUI)

La prima volta per poter usare il menu di selezione giochi (o anche successivamente per aggiornarlo ad una versione più recente) bisogna collegare il chip al pc via usb, lanciare il programma SunDriver APP, premere "Upgrade Menu Program" e selezionare l'iso precedentemente scaricata dal sito ufficiale.
Dopo poco tempo il trasferimento è terminato.

Questo è un esempio di ciò che apparirà sulla TV avviando il menu di selezione dal canale disco.

Immagine Postata


Per utilizzare la gui non serve il collegamento col pc via usb.

ATTENZIONE
Contrariamente a quanto mostrato nel video-tutorial al minuto 2:35, per usare il menu di selezione, i 4 switch vanno posizionati tutti lontano dal led.
Vedremo in seguito come utilizzarli per fornire un accesso diretto ai giochi senza ricorrere al menu di selezione.  

Come utilizzare i tasti RESET e EJECT per selezionare un gioco:
  • Premere il tasto RESET brevemente per spostare il cursore ">" sul gioco successivo
  • Premere il tasto RESET più a lungo per spostarsi alla pagina successiva (se presente)
  • Premere il tasto EJECT per avviare l'iso selezionata


Come utilizzare il pad GameCube per selezionare un gioco:
  • Premere i tasti SU/GIU per spostare il cursore ">" sul gioco precedente/successivo
  • Premere i tasti SINISTRA/DESTRA per spostarsi alla pagina precedente/successiva
  • Premere il tasto B per avere l'elenco dei giochi ordinato sul titolo o sullo slot
  • Premere il tasto A per avviare l'iso selezionata


Una volta selezionato il titolo la wii si riavvia e sul canale disco sarà presente il gioco pronto per essere lanciato.

NOTA
Quando si esce da un gioco e si ritorna al Menu Wii, nel canale disco sarà ancora presente il gioco da cui si è appena usciti.
Per far riapparire la GUI e cambiare gioco è necessario spegnere la Wii e riaccenderla col tasto EJECT. 
Se si riaccende la Wii col taso POWER o tramite wiimote il vecchio gioco sarà ancora presente nel canale disco.


Uso dei 4 switch

In alternativa al menu di selezione si possono utilizzare i 4 switch che sbucano dal vano disco per selezionare uno tra i primi 15 giochi presenti sull'hard disk. E' sufficiente impostare gli switch nelle posizioni K5-K6-K7-K8 corrispondenti al gioco desiderato.
Ad esempio, facendo riferimento all'immagine che mostra il programma Sundriver APP, per selezionare New Super Mario Bros basta impostare gli switch su OFF-OFF-OFF-ON.
5 - TEST


I due SunDriver IDE+CF e SATA sono stati testati su 2 Wii originariamente equipaggiate una con lettore DMS e l'altra di recentissima produzione con lettore D3-2.

Per i test sono stati utilizzati:
  • 1 vecchio hard disk IDE da 2,5" con capacità 40GB (residuato bellico prelevato da un vecchio portatile)
  • 1 recente hard disk SATA da 2,5" con capacità 320GB
  • 1 CompactFlash da 16GB


Durante i test non erano disponibili hard disk da 3,5" ma il costruttore garantisce la totale compatibilità con tutti gli hard disk e CompactFlash in commercio.

Entrambe i chip si sono dimostrati estremamente affidabili, tutti i giochi hanno funzionato perfettamente senza presentare errori di lettura nè rallentamenti o scatti sia durante il gioco che nei filmati.
I tempi di caricamento risultano estremamente veloci, in linea con quelli dell'usbloader per intenderci.

In particolare sono stati testati con successo i seguenti giochi:

Giochi Wii

  • Animal Crossing
  • Call of Duty 3 (non supportato dalla softmod con usbloader)
  • CSI: Intento Mortale (non supportato dalla softmod con usbloader)
  • Little King's Story
  • Mad World
  • Mario e Sonic alle Olimpiadi Invernali
  • Mario Kart
  • Metroid Prime Trilogy (non presenta le limitazioni che si hanno con l'usbloader)
  • New Super Mario Bros. Wii (testato per circa 1 ora e la nuova protezione BCA non ha creato problemi)
  • Rock Band: The Beatles
  • Sam & Max Season One (non supportato dalla softmod con usbloader)
  • Super Mario Galaxy
  • Super Smash Bros. Brawl (versione double layer)
  • The legend of Zelda: Twilight Princess
  • Wii Fit Plus
  • Wii Sport Resort (contrariamente all'usbloader non necessita artifici per funzionare)


Giochi GameCube

  • Mario Party 6
  • Mario Kart: Double Dash!!
  • Super Mario Sunshine
  • Super Smash Bros. Melee
  • The Legend of Zelda: The Wind Waker
6 - CONCLUSIONE


Il team D2SUN ha dato vita ad un ottimo chip che mantiene tutte le promesse fatte nella lista delle specifiche finali.
Inoltre il team ha dimostrato nel tempo di essere affidabile rilasciando prontamente gli aggiornamenti di fronte al sorgere di nuove protezioni.

Il SunDriver si rivolge principalmente a quegli utenti che hanno timore a cimentarsi nella softmod che a causa di un inconsapevole uso improprio miete quotidiamente un numero considerevole di vittime, le povere amate Wii.
Ma il chip potrebbe tornare utile anche agli utenti usbloader in quanto consente di andare oltre le (poche) limitazioni imposte dalla softmod.

Unico neo che salta all'occhio è la mancanza del supporto al lettore che però, vi assicuro, non rimpiangerete dopo aver provato l'ebbrezza di giocare da hard disk in tutta sicurezza. A maggior ragione la rimozione del lettore non è una grossa perdita se la vostra è una Wii di ultima generazione equipaggiata con lettore D3-2, che come saprete blocca definitivamente i dvd di backup impedendone l'utilizzo.


Pro

  • Non richiede saldature
  • Emula il lettore in maniera trasparente al sistema
  • Compatibile con tutte le wii anche le più recenti
  • 100% compatibile con tutti gli hard disk a differenza dell'usbloader.
  • 100% compatibile con tutti i giochi Wii e GameCube. Esegue immagini dei giochi "pulite" senza necessità di patch o artifici.
  • 100% sicuro contro i brick perchè non richiede modifiche agli ios di sistema, inoltre un'opzione di configurazione permette di bloccare gli aggiornamenti presenti nei giochi (molto utile per i titoli di importazione)
  • Contrariamente alla softmod tutti gli aggiornamenti di sistema rilasciati da Nintendo (nei giochi o via WI-FI) possono essere installati senza preoccupazione alcuna
  • Contrariamente all'usbloader i giochi partono direttamente dal canale disco e i tempi di gioco vengono correttamente tracciati nel diario della Wii. Quindi potete tranquillamente aderire al nuovo Canale Nintendo per inviare a Nintendo i dati di utilizzo della vostra console in modo da ricevere in bacheca messaggi mirati alle vostre esigenze.
  • Menù di selezione dei giochi direttamente sulla TV comodamente pilotabile dal divano con controller GameCube.
  • Aggiornabile via USB tramite Nero Dual Programmer (acquistabile a parte)
  • Configurabile da PC via USB
  • Team di sviluppo affidabile e sempre pronto a rilasciare gli aggiornamenti quando si rivelano necessari
  • Prezzo di circa il 20% in meno rispetto al wode, suo diretto concorrente


Contro

  • Non supporta il lettore DVD, quindi non è possibile dumpare i giochi originali sull'hard disk direttamente dalla Wii, per farlo serve un PC.
  • Il firmware del chip non è aggiornabile tramite iso apposita, è necessario il Nero Dual Programmer.
  • I giochi di importazione non funzionano se la Wii è aggiornata alla versione 4.2 o superiore.
  • Contrariamente all'usbloader i tutti giochi occupano 1 banco su disco (2 banchi per i double layer) indipendentemente dalla dimensione reale del gioco.
  • Il menù di selezione giochi non supporta il wiimote. Alcuni utenti particolarmente pigri privi di controller GameCube potrebbero non gradire il fatto di dover alzare le chiappe dal divano per selezionare un gioco. Ma dopo tutto col lettore non era lo stesso?
  • Al momento l'applicazione SunDriver per trasferire i giochi sull'hard disk e configurare il chip gira solo su PC Windows.
  • Allo stato attuale nel menù di selezione giochi manca la gestione dei preferiti per facilitare l'accesso ai giochi usati più di sovente. Sta all'utente caricarli su hard disk nell'ordine che gli è più congeniale. E' comunque possibile metterli in odine alfabetico.
  • Il costo è più elevato rispetto ai chip di vecchia generazione, ma è un chip che ha anche molto di più da offrire


Si ringrazia il team D2SUN per averci gentilmente offerto in anteprima i modchip per la realizzazione di questa recensione.


Recensione scritta da davide253 per NeXtRL.it
La riproduzione della stessa, senza il consenso dell'autore, è severamente vietata al di fuori nel network RL.


By: Nestor

Firstly, apologies to D2SUN for the delay in my review. The Sundriver kit SATA version arrived at my place I think two days after christmas but I have not physically touch til now. I just got back from an out of town vacation to help someone.

Anyway I'm releasing my initial review as I looked into the package. I'll try to power it up this weekend for the full review then.

1st Pass Initial Review.

Packaging:

I received the package in a secured box. Sent out by D2SUN Dec 24 and if I estimate it right it arrived in my place two days after.

Presentation of the wrapped package of the Sundriver is excellent and I think it is already in the market initially in Asia. But has now reach Europe and America because of D2SUNs great effort in introducing it in all corners of the globe.

Package includes:

PCB, Engineering Plastic holder, USB cable, SATA cable, FPC cable, Screws, and its driver.

PCB quality:

Well done. On the soldering of the components obviously an automated inserstion is used thus the quality is high. Some components are manually inserted and that's understandable as AI machines do have limitations.

Overall, it's nicely assembled and professionally done.


By: Manzzon

I have installed this in a EU/PAL Wii thats newer been softmodded, running latest 4.2E software. Tried to connect it to a pc with TinyXP but it doesnt seem to work, missing right driver maybe? Tried on Windows 7 and worked great. Update: The included usb cable didnt work, used another one thats why it worked in Windows 7.

I set all switches away from the the LED and installed a 320GB Western Digital 2,5" SATA harddrive that should fit about 60 games. Installed the latest menu with sundriver programmer using the upgrade menu program button in sundriver programmer.

My conclusion so far - THIS IS A GREAT PRODUCT!


THE GOOD:

+ Faster loading compared to dvd.

+ No more trouble with scratched disks = kids friendly.

+ Easy to use and install, all built in so very nice design!

+ Very user friendly, easy to choose games with the reset/eject buttons on the wii or a gamecube controller.

+ Seems to load every game I throw at it, I will try more later and update the list. Feel free to request a game.


THE BAD:

- Doesnt fit perfectly in the wii, it should be raised about 2mm so i fits better in the dvd slot. I used 1mm nylon washers to raise the front up = fits better.

- You cant use dvd anymore but who cares when you can throw it all on the harddrive?

- The built in screwdriver doesnt really fit with provided screws for the HDD.


IMPROVEMENTS?

* Would like to see some way to queue more games in sundriver programmer. Important improvement!

* I want to be able to change screen size in sundriver programmer.

* Change game names and where the games are placed in the menus with sundriver programmer.

* Update the sundriver with the built in USB instead of a programmer? Probably not possible with current design but would have been a better option with a built in programmer?

* I think you can make the lower part of the box more flat so its easier to distribute?

* Some info in sundriver programmer so its easier to understand what the options do.


QUESTIONS?

What do the Wii Mode button do in sundrive programmer, erase harddrive? What do the Switches in front of the wii actually do, do they set the K5/K6/K7/K8 option?


WII PAL GAMES WORKING:
New Super Mario Bros
Mario Party 8
Guitar Hero 5
Super Smash Bros Brawl
Super Paper Mario
The Legend Of Zelda Twiligt Princess
Guitar Hero World Tour

GAMECUBE PAL GAMES WORKING:
Super Monkey Ball 2
Metroid Prime 2


By: nikkyshusband

well once again were here to test another great quality modchip.
d2sun has had a great reputation with me and i really appreciate all this testing chances they have given us.

Mochip: Sundisk
500 gb sata 2.5 inch
wii dms,d2b,d2c,d2e,gc2-d3,gc2-d3-2
ntsc all wii's

Quality: the modchip comes packaged very well, protected and the chip is hard enough to resist drops and bends. All circuity is well kept, and the whole plastic surrounding seems to take over the drive space the is in the wii.

Installaion: was easy, all you gotta do is replace the game drive with this and apply some screws and your done, plus put in your hard drive also.

Games: adding games was not so compluicated but it would be much better if you can upload multiple files at once instead of one. maybe a firmware upgrade will fix this and the speed is not so slow, but all gams pal and ntsc ran good with no problems. after some tweakin on settings all went good and great. im really impressed by this one, we actualy have a dvd drvie replacement..no more disc..

pros: great quality, speed, and game discless..

cons: uploading games once at a time,thats bout it..

I would sure recommend this to anyone out there looking to purchase a modchip because with this you can get rid of spending money on dvd's all the time. thanks D2sun..great job.!!


  SunDisk 8GB/16GB Review Collection     >>> More review please check here <<<
  By: ahtin

Black Wii Japan 4.0 with D3-2 Drive work perfect with SUNDISK!


  By: ModPro

Well, I guess it is my honor to make the first (short) test review

Received my 18 GB SunDisk sample few days ago and could not wait to play with this new toy :-)
I've tested the SunDisk on a 4.1 PAL Wii with D2E DVD.

Packaging
I was very supprised about the packaging

looks very nice

Build quality
As usual with the d2sun products, the build is from high quality.
The back of the PCB, where the memory residence, is nicely covered to avoid shortage.
The PCB design has perfect outlined fit for mounting on the chassis of the wii.

Headlight of Promised Features
* Play DVD
* Play backup from SunDisk
* Backup DVD to SunDisk
* Dump DVD Backup from SunDisk to PC
* running speed: >8X , backup one D5 game just need 15minutes
* data transfer : USB 2.0 high speed
* support PC configure and external switch configure
* 8Gbyte version can store one Wii D5 and one GC game, and support D9 too
* 16Gbyte version can store Wii D5 game X3 at the same time

Well, that sure looks promising, especially the speed and make backup features.

So after installation I straight away wanted to test the make backup feature.

(To get used to the config PCB switches I Took the
http://www.d2sun.com/SUNDISK_Switch_V1.0.jpg by hand.)

My Experience
So I powered up my Wii and put in an Wii Sports (original) and powered down the wii with the DVD inside.
I setup'd the PCB config switches to enable the backup process:

K1 -> on (Run DVD)
K3 -> on (start backup)

and selected bank0 to use to store the backup on the SunDisk

K7 -> off
K8 -> off

Then i powered up my wii and after booting the led light on the pcb starts flickering.
The backup process is started.
(At this moment the Disc Channel on the wii looks like there is no DVD in the Wii)

After 15 minutes the led light on the pcb stopped flickering, indicating that the backup process is finished.

I powered down the wii and reset the pcb switches to enable SunDisk, want to see what is in that memory bank I selected for the backup.

After booting the wii the disc channels almost instantly displays Wii Sports,
to be sure I ejected the Sports DVD from the wii and started the game.
Much faster then expected the games starts to play :-)

Oke, cool, now I wanted to know how fast the just created backup of my Sports DVD could be dumped from the SunDisk to my Wii.

I've downloaded the
http://www.d2sun.com/download/SUNDIS...ammer_V1.0.rar
and unpacked it on my desktop.
The SunDisk control PCB has the usb connector onboard, so I placed it in my usb hub on my desk.
Windows prompted me for a new usb device and in seconds it was ready to use, no drive install nessecarely.

Started the program to see how to dump this backup.
Interface is pretty straight forward and could use some more user-friendly touch.

So, the Sundisk programmer tells me the 'SunDisk Ready' and I select SunDisk -> PC.
Error popup tells me to 'input file name please!'
Tried to type it in the filename field but that was not working.
oke, use Select, but wait... I do not have that file yet on my system..
just typed the desired filename in the popup and click oke.
the newly choosen filename is now displayed in the programmer.

Click SunDisk -> PC, new popup ask me to select the iso format (1,5 GC - 4.7 Wii D5 - 8.5 Wii D9).
Selected 4.7 Wii DVD5 for the normal wii sports backup and hit enter.

progress indicator starts running and i start clocking. After 4 minutes the dump from SunDisk to PC was done!!!
wow, that was fast, lets see how fast it writes back to the SunDisk.

On the pcb I setted the switches to use bank2 (third bank) by setting K7 -> on and K8 -> off.
In the programmer i still had already selected the wii iso filename, so I hit 'PC->Sundisk' button.
after 6 minutes the backup to SunDisk was finished.

Nice, little slower then dump to pc but still nice.

Tested very quickly of the wii sports from bank2 was working, and guess what.. off course it was working.

Oke, now make a Backup of a original DVD9, ssbb.
This is a Dual Layer backup, so that won't fit into one bank (we can set active one bank at the time, remember)

Well the SunDisk handle this as follows, it detects the DL DVD and gues what? second layer will be written on bank next to the one selected active.

[ so use only bank0 of bank1 to start a DL backup, otherwise there is no space for the next layer]

So I selected bank0 to be active ( K7 off, K8 off ) knowing that i still have bank1 empty (wii sports is now in bank0 AND bank2) and switched the jumpers for the backup process (K1 on, K3 on). Boot up and wait..

WOW, the backup of that DL'r only took 23 minutes!

Tested the SSBB to run from SunDisk….
.. it is fast loading and playing perfectly!!

So successfully backup'd a D5 and D9 to the SunDisk, dumped the D5 to pc and uploaded D5 to SunDisk again.
Nice.

Still have to do the dump of that SSBS DL backup which is now in bank0 and bank1 and do some more testing,

...but very busy at the moment so, more to come soon :-)

Conclusions for now,
This is a great device, not only for playing backups but also to make your own legal backups!
No sofmod needed.
Control pcb handling is not so user friendly but definitely doable.
User Interface needs work but is functional.
Speed? Amazing!!
- backup D5 -> SunDisk 15 took minutes
- backup D9 -> SunDisk 23 took minutes
- backup D5 SunDisk -> PC took 4 minutes
- backup D5 PC -> SunDisk took 6 minutes

ps, somebody whispered me that very soon there will be an update for te current programmer software which will make the usage of the SunDisk much more easier ...
 
By: TripleJ85
Thanks D2Sun for sending me one of the initial samples - I've had fun playing around with it.

Below are a few pics of the product and packaging.


^SunDisk in packaging. Professional looking package, but it was maybe a bit tricky to get the chip out.


^Rear of package


^Nero Dual Programmer (what is the little red daughterboard for D2Sun? - says SPI board for V2.0x)


^Contents of package unpackaged


Sunkey connected to a Win7 x64 7100 box - appears to detect fine *but* the SunDisk Programmer never shows the sundisk as ready.


^SunDisk Ready! (on an XP SP3 machine)


^Wiisports being loaded on the to SunDIsk


^Error shown after first attempt at programming. Second attempt is running now, has completed and is Verifying.

The packaging looks very nice, and the chip is of the same quality as other SunKey products.

I have had problems getting the SunDisk to install drivers properly in 64bit windows 7, but it seems OK in WindowsXP. Dumping of games sometimes fails though. Please let me know if there is a firmware update I can apply.

I've just installed the SunDisk in my wii and performed some tests.

Wii Details:
~March '08, PAL (Australia) model with a D2C drive. Optical drive has a Wasabi drivechip attached. Wii is running 4.1e - with no software modification other than bootmii, HBC and cIOS.


My first trial was just using the SunDisk in the wii alone, without any optical drive attached.
Wii boots fine - and news/weather/homebrew channels work fine. (many don't without a drive attached normally). This is a good sign for people with broken drives, or who want a silent, hard drive/ssd only system.
Tried launching a hdd loader app - it allows you to run games with a SunDisk in, which don't usually work without a DVD-ROM. You can't dump games from SunDisk to usb hdd, but this isn't a big deal.
The disc channel showed wiisports which worked well. I had pre-loaded this on using windowsxp (as discussed above).

Second trial:

The same 4.1e wii - but with the optical drive attached (with a Wasabi drivechip). The disc dump was successful and loaded off the sundisk properly. Please see below youtube videos for more details:


http://www.youtube.com/watch?v=9Ho8Kgt1ccY

http://www.youtube.com/watch?v=ckDo2NC4KZ4

http://www.youtube.com/watch?v=i9x1UGMTFBY


& Here is an image of the SunDisk in action -


Summary of product first impressions:

Benefits

All-in-one solution. Allows backup games to be loaded as well as those from the SSD. Allows games to be run using their original IOS as if they were real discs - no cIOS required which makes it much less likely to be patched by Nintendo.
Allows for silent wii operation - very nice, considering how noisy wii dvd drives are!
Allows for usage of the wii without an optical drive installed at all.
High quality product with very professional presentation.

Things which could be improved

Software interface is a bit clunky.


  SunKey Review Collection     >>> More review please check here <<<
   

By: supermodchips.com.au

How to Install a Sunkey Lite Wii Modchip

Installation of a Sunkey Lite Wii modchip is very easy, anybody can do it. Below are step by step video tutorials showing you how to install a Sunkey Lite Wii modchip.

The Sunkey Lite Wii Modchip is our most recommended Wii modchip at the moment as it is SO CHEAP! And it works 100% on all Wii models.


Sunkey Lite Wii Modchip installation overview

>Step 1 - Dissasemble the Wii <jump to video tutorial>

>Step 2 - Install the Sunkey Lite Wii modchip <jump to video toturial>

            a) Set the switches according to your region. Australia is PAL.

            b) Connect the ribbon cable from the Wii to the Sunkey Lite modchip, into the side marked 'W-IN' which stands for Wii in.

            c) Tape the SunKey Lite modchip down with the provided 3M strip

            d) Connect the provided ribbon cable to the other end of the Sunkey Lite, the side marked 'DVD OUT'. Silver side down.

            e) Connnet the other cable to the Wii DVD drive. Silver side down.

            f) Recconect the Wii DVD drive power cable (see video), and test it out with a backup game.

>Step 3 - Reassemble your Wii <jump to video tutorial>

>Step 4 - Have fun and happy gaming!!

Warning! Ribbon cable clips should clip down with minimal force. If the clips are not clipping down with minimal pressure DO NOT FORCE THEM CLOSED! If you force them closed there is a good chance you will break the clip and they cannot be replaced. Thus if you break a ribbon cable clip on the Sunkey Lite Wii Modchip, you will need to buy a new Sunkey Lite Wii Modchip. If you break the ribbon cable clip on the Wii DVD drive, you will need to buy a new Wii DVD drive. If the the clips are not clipping down easily reseat the ribbon cable in the clip, sometimes if the ribbon cable is pushed too far into the clip, the clip won't close easily, try bringing the ribbon cable out just about half a mm, and then closing the clip.


FAQ and Common Problems

It gives an error message when I insert an original or backup game

You most likely have not set the switches on the Sunkey Lite Wii Modchip correctly according to your region code. Check out the Sunkey website here for region code settings for the modchip, we also show you how to set it in the video <jump to video tutorial>

or

You have got the 'W-IN' and 'DVD OUT' side of the Sunkey Lite modchip mixed up. Make sure the ribbon cable from the Wii goes into the 'W-IN' side, and the ribbon cable leading to the Wii's DVD drive go into the 'DVD OUT' side of the Sunkey Lite Wii Modchip

or

You haven't connected the ribbon cables properly. Double check all the ribbon cables are inserted and clipped down properly.

It's not recognizing any discs I insert

You most likely haven't connected the ribbon cables properly. Double check all the ribbon cables are inserted properly.

The backup game won't play, but original games do.

Most likely your backup game is of poor quality and/or on cheap media. Burn your backup games at slow speed, and use good quality media such as Verbatim DVD-R or Rikotek DVD -R (-R is slightly better compatibilty than +R). Don't use cheap media such as 'no name', Imation or Sony (yes Sony media is no good). Sometimes you will find that a backup game will work in your friends Wii but not on yours. This is because different Wii's have different strength lasers, also lasers weaken over time depending on use. If your Wii has a slightly weaker DVD laser than your friends Wii, you will find that you'll need better quality backups than your friend. Burn your backup games at slow speed, and use good quality media.


How install a Sunkey LITE Wii modchip Video Tutorials


By: TripleJ85

I've just conducted some..... interesting tests.


Silly? Definitely... useful? maybe.

I didn't have an unmodded wii at hand - and didn't really want to attack my wasabi with a soldering iron again. So thought I'd try Sunkey AND Wasabi.

My Wii is a PAL D2C Wii - Purchased in Australia in March 2008. It has a Wasabi from the very first batch. I have no system menu modifications (no softmii / cioscorp etc) Just homebrew channel, cIOS v10 - otherwise fairly untouched. I have no NTSC news/weather channels - so any NTSC games should prompt for an update to install those, unless a blocker gets in the way.

Anyway... let's get on with the show:

Methodology... Disable everything I could on the Wasabi.
Region Free - OFF
GC Audio Fix - OFF
Read Speed - 6x
Update blocker - Imports - OFF
Update blocker - Domestic - OFF

From here I could test the features of the Sunkey (other than allowing backups).

Region Override - works.
*Note - D2Sun labeling of this is the opposite to what I would expect. Region Lock ON means only own region games will work. Region lock OFF means it will over-ride the disc region to your own.

Update blocker - works.

Autoboot - works... with the exception, that Super Smash Bros Brawl backup NTSC freezes for me and asks me to put the disc in almost straight away. This could be because I'm crazy and am running 2 mod chips at once! Maybe others can test this. Other games autobooted fine.

Thoughts... installation is VERY easy. Quality seems quite good. All the LEDs being ON when the Wii is off is a little strange - I wouldn't have set it up this way.

Assuming the chip works for allowing backups (not a big ask) I'd recommend it. As soon as I get a chance, I'll try it out in an unmodded Wii. I took some videos, If they're any good - I'll upload them soon.

EDIT: Video up now -
http://www.youtube.com/watch?v=CbAb-lG_SU4
Might be a bit boring though :P


By: TheForce81

Here my report on the Sunkey lite and Sunkey. I got it in two days ago and the chips look very solid from the outside, the Sunkey Lite has my preference for regular installation with customers, as the install looks a lot cleaner and ppl do not see anything outside the Wii. Nine out of ten customers do not want bells and whistles on their equipment that they will never use themselves anyway.
The red Sunkey is a good chip for future updates if Nintendo would make an adjustment in an update which ppl can't ignore of course, but then I would simply don't install the cables with regular customers. Updating a chip has never been necessary in my experience, only for less wire installs with the Infectus Argon chip, but I have never needed an update through Jtag in the past for critical updates. If ppl need it anyway, they can come to me and I will update the chip for them.
The chips come with an anti-static attachment tape, which is of very good quality and sticks very well, can't comment on future reliability of course, though 3M is good stuff and I think it will last longer than the Wii itself :P

I installed the chips in a D2E with Epoxy on it, was done in a second! That I like of course, while installing chips might be less exclusive to pro modders now.
Though many ppl who come to me just do not dare to open the Wii themselves. They still will come to me and I doubt most of them even know the difference between these chips and soldered chips.

Turned on the Wii and it worked great, with originals, Dual layer back-up of SSBB and plain single layer Wii/NGC back-ups, this goes for both of the Sunkeys which were sent in the package. To be honest, I can't really tell this is a test version, they work like a chip should and more!
With the autoboot feature on the Sunkey version you got something that makes the Wii more old school console feel and a faster way to play your games.

The Wii I tested on was a European version and serial number: LEH25520XXX

So to make a short conclusion, depending on the price difference of the lite and normal version, I would choose the lite version for regular customer installs as the prices differ too much in my experience. But when the difference is very small (2-3 Euro's difference) I would choose the normal red version.
The fact that you do not have to remove any epoxy when a drive has it on it and you do not need to solder, which results in no warranty expiring installs is the biggest reason for me to choose these chips. When a drive breaks down in warranty you can simply remove the chip and send it to Nintendo, no problems! The install time is a nice bonus as well of course
.


By: Dark Mod

Review of the lite-edition sunkey

Packaging wise: Very neat and ribbon cable is tucked in nice and neat away from the sharp edges of the chip.

Engineering: Small and simple ( a little smaller than the flatmod)...the color of the chip is very nice too.
jumper settings is really easy to set, just two dip switches.

Installation: Super, super easy (although I wanted it in solder version...lol) everything is just plug and play. However, I ave total confidence newbies will and i mean WILL break either the cable or the cable clips on either the chip or drive.

Performance: Very similar to the wiikey1, the boot performance is fairly good. I know alot of installers talk about drivespeed for certain games, but to me, it is not really a big issue, cause i find that the faster the drive disc motor spins up, the louder the laser mechanism gets and eventually wears out the laser. All problematic games like brawl, mario galaxy, paper mario and any other kind of problematic game too much to mention boots "on the fly".

The chip works really really good on the D2B (with cutpins) drives. Boots all kinds of double layered media (for SSBB) flawless with or without layerbreak. I haven't tried it as yet on a d2nothing drive as yet caus i haven't got one as yet.

One thing i noticed about these solderless chips and which i'm really glad for, is that it have no eject, disc insert or drive inching issues (thumbs up)

One thing i've noticed D2sun, the pro edition have the "PROASIC 3" FPGA and the lites have the "IGLOO" edition FPGA.
What is the difference between the two?
Is it performance wise or signal injection wise?

Review on the lite-edition upgradeable 1.3a5 (solder type chip)

Engineering: just like the non-upgradeable chip...it is very well designed. I've noticed that the Proasic3 FPGA is no longer in use here...but it is cool.

Installation: for professional installers, installation is a breeze....just 6 wires, jumper setting is fairly easy.

Testing on drives: D2A: boots all problematic games and both single and double layed SSBB beautiful.
DMS: very tricky to manipulate the chip for the drive, but boot performance and drive initialising is fair.

D2B: (with or without) one word..........BEAUTIFUL!!!!!!......no problems whatsoever.
D2C (v1):......ummmmm...minor hiccups still with disc insert issue, but boot wise....perfect.
D2C (v2) one shot installation, configuration and drive initialising. Booting of all originals and backups is really good. However during a couple hours, when you have to switch to a new game. Either the game don't want to load or didn't wanted to go in the drive and you have to turn off the wii.....count to 30 then turn it back on.

D2E (without epoxy) boots and starts up as if there is no chip installed. Boots everything flawless and fast.

D2E (with epoxy): Advice to anyone who have this kind of drive......don't waste your time using the alternative K point or the first pin on the IC (just like the wiikey2 chip) Use the original point that the non epoxy drive have......believe me, you won't regret it. Plays every piece of media perfect.

Review of the sunkey pro
I'll only recommend this chip to experienced people who have a clear understanding on how to operate this chip with all the necessary jumpers and stuff. It have all the cool features just like the drivekey and DX (eg. autoboot, update block, but this feature is really new to me....it is called the "chip stop"...i'll probably get to understand this feature very soon if someone can explain this to me....lol.

Engineering: It is about 3 and a 1/4 smaller than the v3pro d2sun,i've noticed it still uses the Proasic3 FPGA which is good in my book.

What comes with the sunkey pro: The sunkey chip of course, configuration board, drive cable and double sided tape for chip and configuration board.

Installation: fairly easy but too much complications with the configure board. In other words, alot of my customers won't want something hanging out and stuck on to their wii cases.

Performance: Well......for all of the drives except the d2nothing this chip is really cool.

The region lock feature is ideal for installer to activate for users who don't have a clue about semi-brick and double channel and to prevent anyhing from happening to the wii.
The Update block feature is what i favor the most on this chip, i can set it for any out of region game that have an update and allow the game to boot. That is a plus in my book.

The only feature that annoys me the most is this autoboot feature. I mean, everythime I have to come out of a game, it goes right back in....that feature makes no sense whatsoever. But otherwise the "chip stop" feature have me confused. I'm sure you guys can explain this to me.

Performance and stability is second to none....It blows both the drivekey and DX out of this competition.


By: Modpro

Had some time last week to test the new Sunkey and Sunkey Lite samples. (thanks D2Sun!)

I've tested these samples on DMS, D2B, D2C v1 and v2, D2E non/with -epoxy.
Unfortionally I do not have a D2-nothing/D3 drive to test on.

The Nero Dual Programmer
====================
I was already familier with this nice device, used it a lot on the d2sun chips.
Does the job and does it good. good design, a 'got to have' for sun installers.

The Sunkey Lite
===============
Nice design, good build quality.
Perfect quality solution for mounting the chip!
Install is easy as advertised, set the jumpers to reflect your region and voila enjoy your games.
Tested a bunch of (problem) titles and all performed very well. Media compatibilty is 'as used' for suns (good!)
Lite version is not upgradeble as advertised.

Personally I would like to see the chip to have brick protection (update-blocker)
Note that the d2sun's (previous gen.) also don't offer such protection, so I'm used to that.
But mainly customers feel a lot safer with such features..

The Sunkey
==========
Nice design, same style as the D2sun V3's.
Updateble with NDP programmer.
I noticed that the ribbon to connect the NDP is not included with the chip.
I'm not sure if this is included with the retail package, older chip versions actually did included the ribbon.
Personally i prefere to have the ribbon packaged with the sunkey in order to directly install the ribbon.
In that way customers don't have to get the wii opened again to add the ribbon to do an update.

Installation requires a bit more 'skill's then the lite version. Personaly it was a bit 'hard' to connect the external board ribbon to the sunkey.
'hard' end of ribbon could be a bit longer to make this more easier to connect.

Jumper settings, 1 setting got me at first, K1, chip mode. I put it on 'on' by nature and later figured out it has to be 'off' to have the chip to be enabled.
Rest of it, doable by just following instructions.
Personally I would like to have these features (update blocking etc) by some kind of config menu. The jumper board could be a bit confusing for customers.

Tested same bunch of (problem) titles and all performed very well. Media compatibilty is very good.

firmware update,
I've tested the firmware update of May 15th, SUNKEY V2.01 (SUNKEY-v2.01-A3P125_A.I.)
Make sure the ribbon is connected correctly (blue tag under), if connected wrong the updater will 'recognize' chip but fails after 'start'.
update is easy as advertised, took me a small minute to complete.
As test, I flipped the region jumpers to set region to NTSC (on a PAL wii) to see if AI is auto-detecting this correctly.
and guess what? yes it just works, so really no need to set region by jumpers with the new AI-boot firmware

Overall
+++++++
SunKey test results where impressive. chips performces well.
This is not surprising, chips from this team always performed very well.

Media compatibility is (again) great. Disc are very fast recognized in the disc-channel.
I think the sun chips still has the best media support of all!

So I'm happy d2sun is now offering the sunkey solution, now we can offer customers a full 'Sun' solution again

Can't wait to see how the SunKey Pro is performing (sample welcome )


By: bcas9472

First off, love the anti static tape solution included for install. The install was a since, easiest I have ever done. I have modded WII’s for maybe a year, with all sorts of 19-6 wire solutions, but never once a Drive chip till now. Can I say – WOW, very easy!

Some initial games such as SSBB had a second or so where the video was choppy, but the game play was good. Initially I burnt SSBB on DL without layer break and got the white screen of death, but after changing to manual layer break, the drive read the game fine.

No other issues with any other games.

I tested on three different versions of drives, DMS, D2B (Cut pins), and D2C. With all three versions, tested on a 3.2U NTSC WII, different region games played when following the install guide for region playing. I used several different types of media, but all DVD-R’s, and DVD+R DL for SSBB

The Update blocked feature of the sunkey (non-lite) is wicked cool. Up to this point, I have asked all my customers to use brickblocker to avoid semi bricks, but some people are clueless, so activating this feature is a great fail-safe for most juvenile users.

I did not test the autoboot feature yet, but was hoping to get in on the sunkey-pro action for the second round, where I will be able to do some more comparison of features vs. chip versions.
More to come in the future.

The toggle switches were easy to change for the wii, and the chips booted up everything I threw at it, including a few PAL imports I had laying around the office.

I really like these chips.* The D2Sun also includes an external switch that allows you to disable the chip and leds on it show the chip’s status.
I highly recommend these modchips


By: ps2guy
i just downloaded the lastest firmware and installed it onto the chip, i like this lil addon that you have added very impressive,

i did try these 2 version on DMS and a D2B cut pin and both chips worked great, i will now try this A.I. version and report back asap, i've also been meaning to load up some pics but never got round to doing it (lazy).

Apart that this is great product i'm spewing i don't have any more console to test atm as it a lil quiet here,
Nero Programmer
D2Sun team is the only one who i know who actually brought out the programmer and actually put it to use, was quite surprised you added it with the sample, very simple to use which is a good thing for the people who arn't very cluey with this type of stuff.

Lite version
I know people have already stated this, but again it's a great chip pitty you can do anything with it as in adding the software etc... or though it's the lite version. Simple to install and was tested on a D2E DMS & D2B (cutpin) tested close to 30 games all worked with out a hipcup was quite surprised that both trucha and DL version of SSBB worked intro movie played fine.

Sunkey Version
Again another great and stable product, with a little more features which i like, was easy to install tested on a D2E DMS & D2B (cutpins) tested close to 30 games both trucha and DL version of SSBB loaded fine intro movie was smooth, also tried SMB again it loaded and worked fine, i also liked that the fact you added an external configure board if you decide that you want to change the settings and turn off auto boot function. I used the nero programmer on this chip and have yet to test the chip with the lastest firmware.

I reprogrammed the d2sun version to v2.01D, and noticed that the 3 games i couldn't get to boot before now boot with this update,

the games were
Chicken Little
Super Monkeyball
Pajama Sam dont fear the dark

also retried SSBB DL version, and still worked great
good work d2sun team, i have yet to try out the pro version when i get some free time i will.


Final Opinion
I was happy to be one of the testers for the D2SUN team, and thank you for choosing me, as i first time user of any d2sun product i was quite surprised of the outlay you produce on this product, not once when i tested both versions did i run into any trouble, all the games i used to test these chips with loaded without any issues, these are very stable safe and high quality chips. I'd be glad to test any new products you decide to bring out in the near future once again thank you for choosing me to be a tester.


By: stefanox

Sunkey Lite version
I know people have already stated this, but again it's a great chip pitty you can do anything with it as in adding the software etc... or though it's the lite version. Simple to install and was tested on a D2E DMS & D2B (cutpin) tested close to 30 games all worked with out a hipcup was quite surprised that both trucha and DL version of SSBB worked intro movie played fine.

Sunkey Version
Again another great and stable product, with a little more features which i like, was easy to install tested on a D2E DMS & D2B (cutpins) tested close to 30 games both trucha and DL version of SSBB loaded fine intro movie was smooth, also tried SMB again it loaded and worked fine, i also liked that the fact you added an external configure board if you decide that you want to change the settings and turn off auto boot function. I used the nero programmer on this chip and have yet to test the chip with the lastest firmware.

Final Opinion
I was happy to be one of the testers for the D2SUN team, and thank you for choosing me, as i first time user of any d2sun product i was quite surprised of the outlay you produce on this product, not once when i tested both versions did i run into any trouble, all the games i used to test these chips with loaded without any issues, these are very stable safe and high quality chips.


By: Zebra

Hi all,

With the help of the SunKey crew, we've been given the opportunity to test the new SunKey solderless Sunkey Pro and Sunkey Lite Wii solutions. So far, I can report a very sturdy product with an enjoyable amount of "hands on" associated with getting it up and running.

So, without any more blah blah:


Contents of the packing SunKey sent to us:


Plenty of fun ZIF mess to be had here. From left to right, we can see the Lite version of the board, the Nero Dual Programmer (PICT) USB interface, some adhesive pads, the PRO version of the board, more adhesive stuff, and the ZIF interfaces. Note the fat one is for Wii interface, the thin for USB and configure board.

A close up of the PRO version of the board reveals a little complexity. It's got the programmer integrated on the board, as we've been informed, so logically, it is slightly more bulky than previous generation chips, such as the Wasabi/Wiikey et al.


Pictured towards the bottom of the device, we see the NT3200 Nero Dual Programmer (the bit that flashes stuff/takes instructions from the flash API we run on our computers, and dumps it to the flash region of the board). Important to note, the configure board, which is designed to live EXTERNALLY to the Wii, stuck on the side (adhesive pad reasoning) can be removed:


This reveals the generous ACTEL control chip to us. Sweet.

Anyway, time to plug it in and turn it on.

With one end of the small (thin) USB cable, we insert it into the WHITE pin out on the board. With the other, we plug it into the makeshift USB device.


RED LED! Let's check on the board itself:


Huzzah! It appears we have power coming over the USB to the chip.

Almost instantly, Windows 7 started behaving to install the appropriate driver for the flash control part:


Immediate, almost:


Flashing.


As with anything worth it's weight around these parts, we just had to flash it to current level firmware. It's not fun, otherwise ;). As follows, the interface detection for the flash part:


Whilst this is happening, the Sunkey shows a different diagnostic LED, for "writing". Note the GREEN LED:


So now, we have some nice new current firmware!

Next time, we'll stap the device into the Wii and run through some testing...

z


D2Sun Review Collection     >>> More review please check here <<<
D2SUN review and feed back:

http://www.elotrolado.net/hilo_review-d2sun-v1-2-v5b-y-d2sun-v2-v12_1052838

http://www.elotrolado.net/hilo_review-d2sun-v1-0-y-wii-clip-v5b_1040376

http://www.elotrolado.net/hilo_comparativa-de-chips-d2c2_1069617

http://www.nextrl.it/forum/index.php?showtopic=26631


The review by markus:

The D2Sun V2.02 SPI is the first wii modchip without any solder jumper and also one of the first wii chip for ALL wii versions - including the new D2E and the Korea region! With this high end mod-chip you can boot DVD+-R or DVD+-RW wii / GameCube Imports / Backups and Hombrews!

The installation is a real "sunrise" due to the reduced wires (only 9 wires for D2C, D2C2 and D2E) and also due to the switch jumpers. But this is not all, because this is wii mod-chip comes with a 24M on board CLK and therefore it is 100% work stable on all wii´s, without any CLK problem some other Mod-chips have.

You need more ? --> here it is: This high end wii chip introduce the programming concept called "MULTIFUNCTIONAL JTAG".
 D2-Sun V2.02 SPI is consisting of a last generation ACTEL chip that can be re-programmed with different firmwares. The JTAG update suffers the fact that it needs an external USB programmer to be implemented, but it gives to the developers the possibility to COMPLETELY CHANGE THE CHIP CODE, SOMETHING UNTHINKABLE FOR OTHER PROJECTS - BEFOR OR AFTER THE INSTALLATION - WITH and WITHOUT a Wii!

If you want the most stable, highest-quality and feature-packed Mod-Chip for your wii then you need only one - the
D2 Sun V2.02 SPI
 ModChip!

--- by markus


The review by kytu:

Hello, i have one sample of D2Sun v3 and D2Sun v1.31, i had tested two on D2E drives and D2C problematic drives, with 7 wires and Wii-clip (v12 for D2Sun v3 and v5B for D2Sun v1.31). The results are very good, works stable with 7 wires, run immediately power on Wii, on problematic D2C drive one D2Pro9 have problems to run, but two D2Sun works very well.

Here is the link: http://www.elotrolado.net/hilo_review-d2sun-v1-31-v5b-y-d2sun-v3-v12_1088937


The review by xboxbman :
D2Sun(V3.0) Review

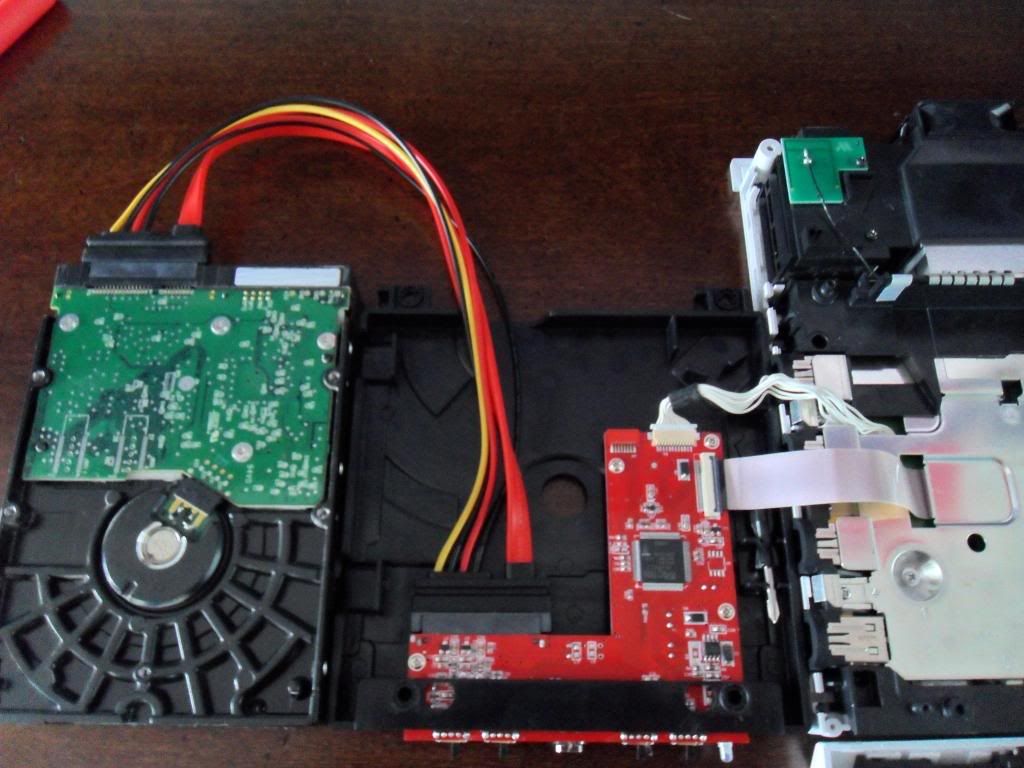
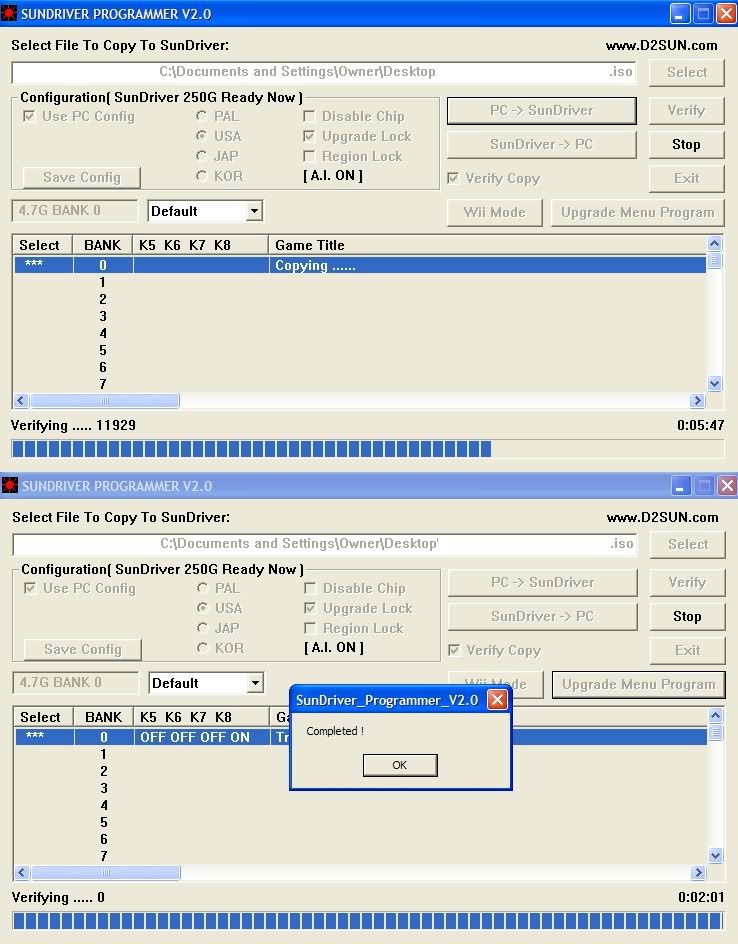
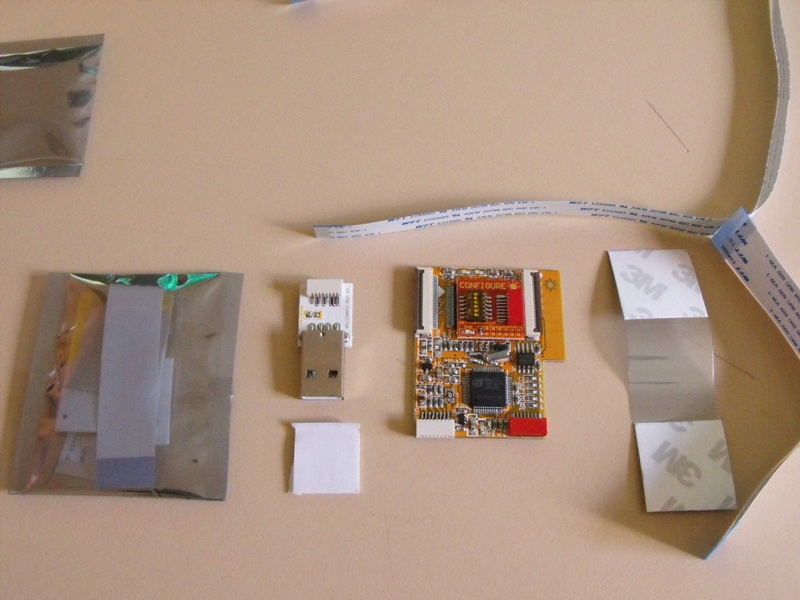
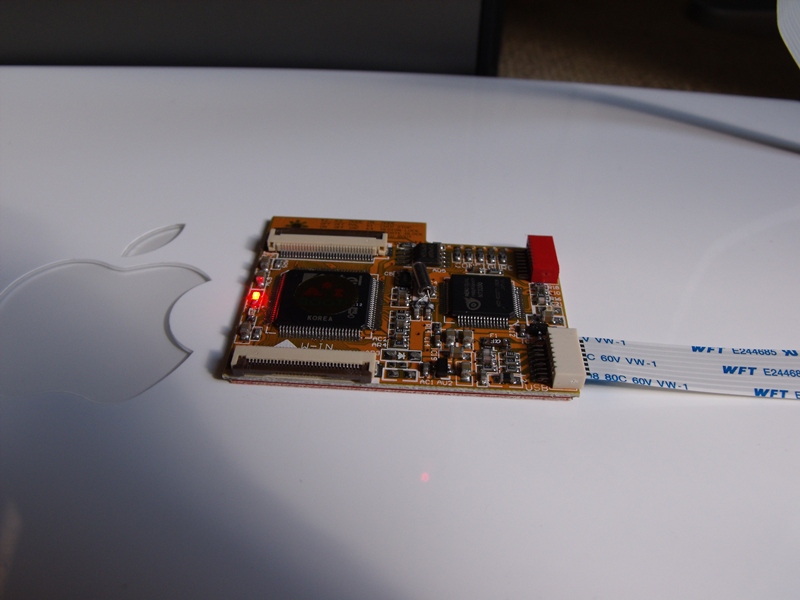
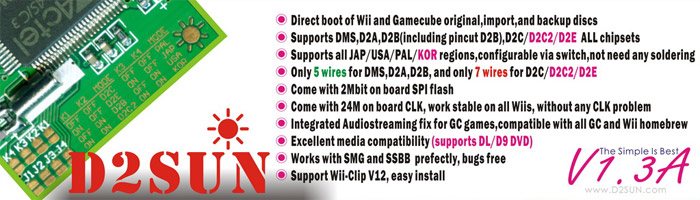
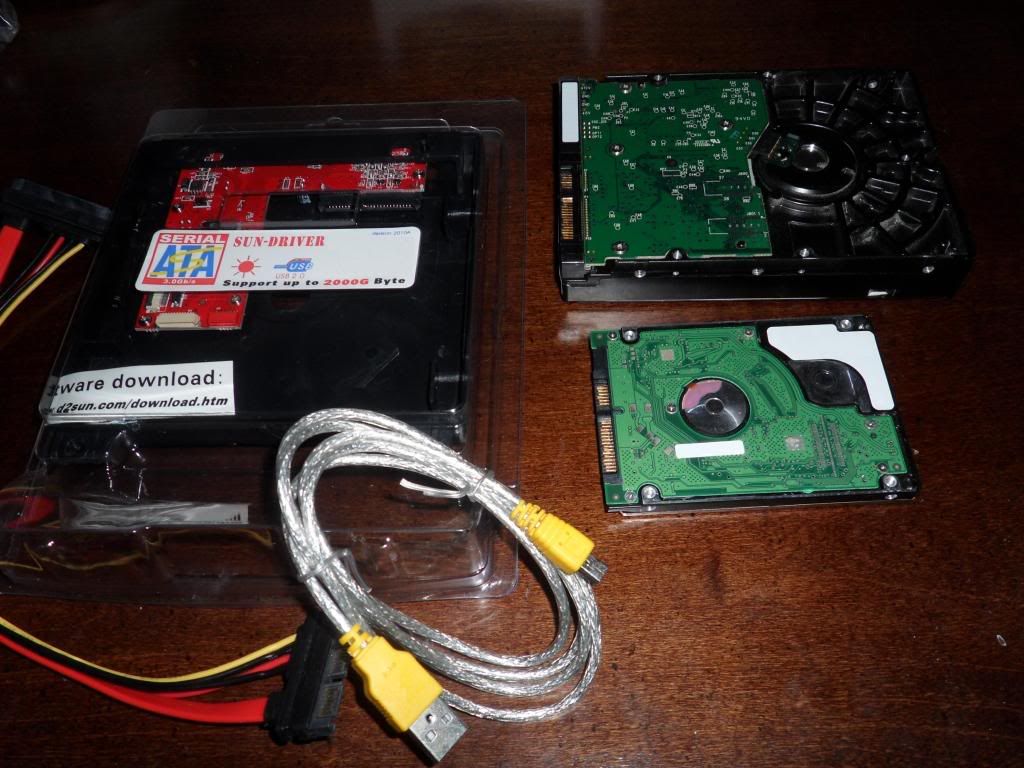
First I would like to thank the makers of the D2Sun(V3.0) for sending me a sample to review.

This chip was tested on a D2A, D2B, D2C and D2C2.  All Wiis tested were 
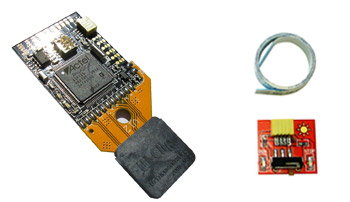
NTSC.  A Wii-Clip was included with it, and tests were done initially with a wire install, then with the Wii-Clip

Performance Review:

D2A: 

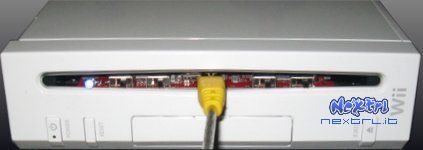
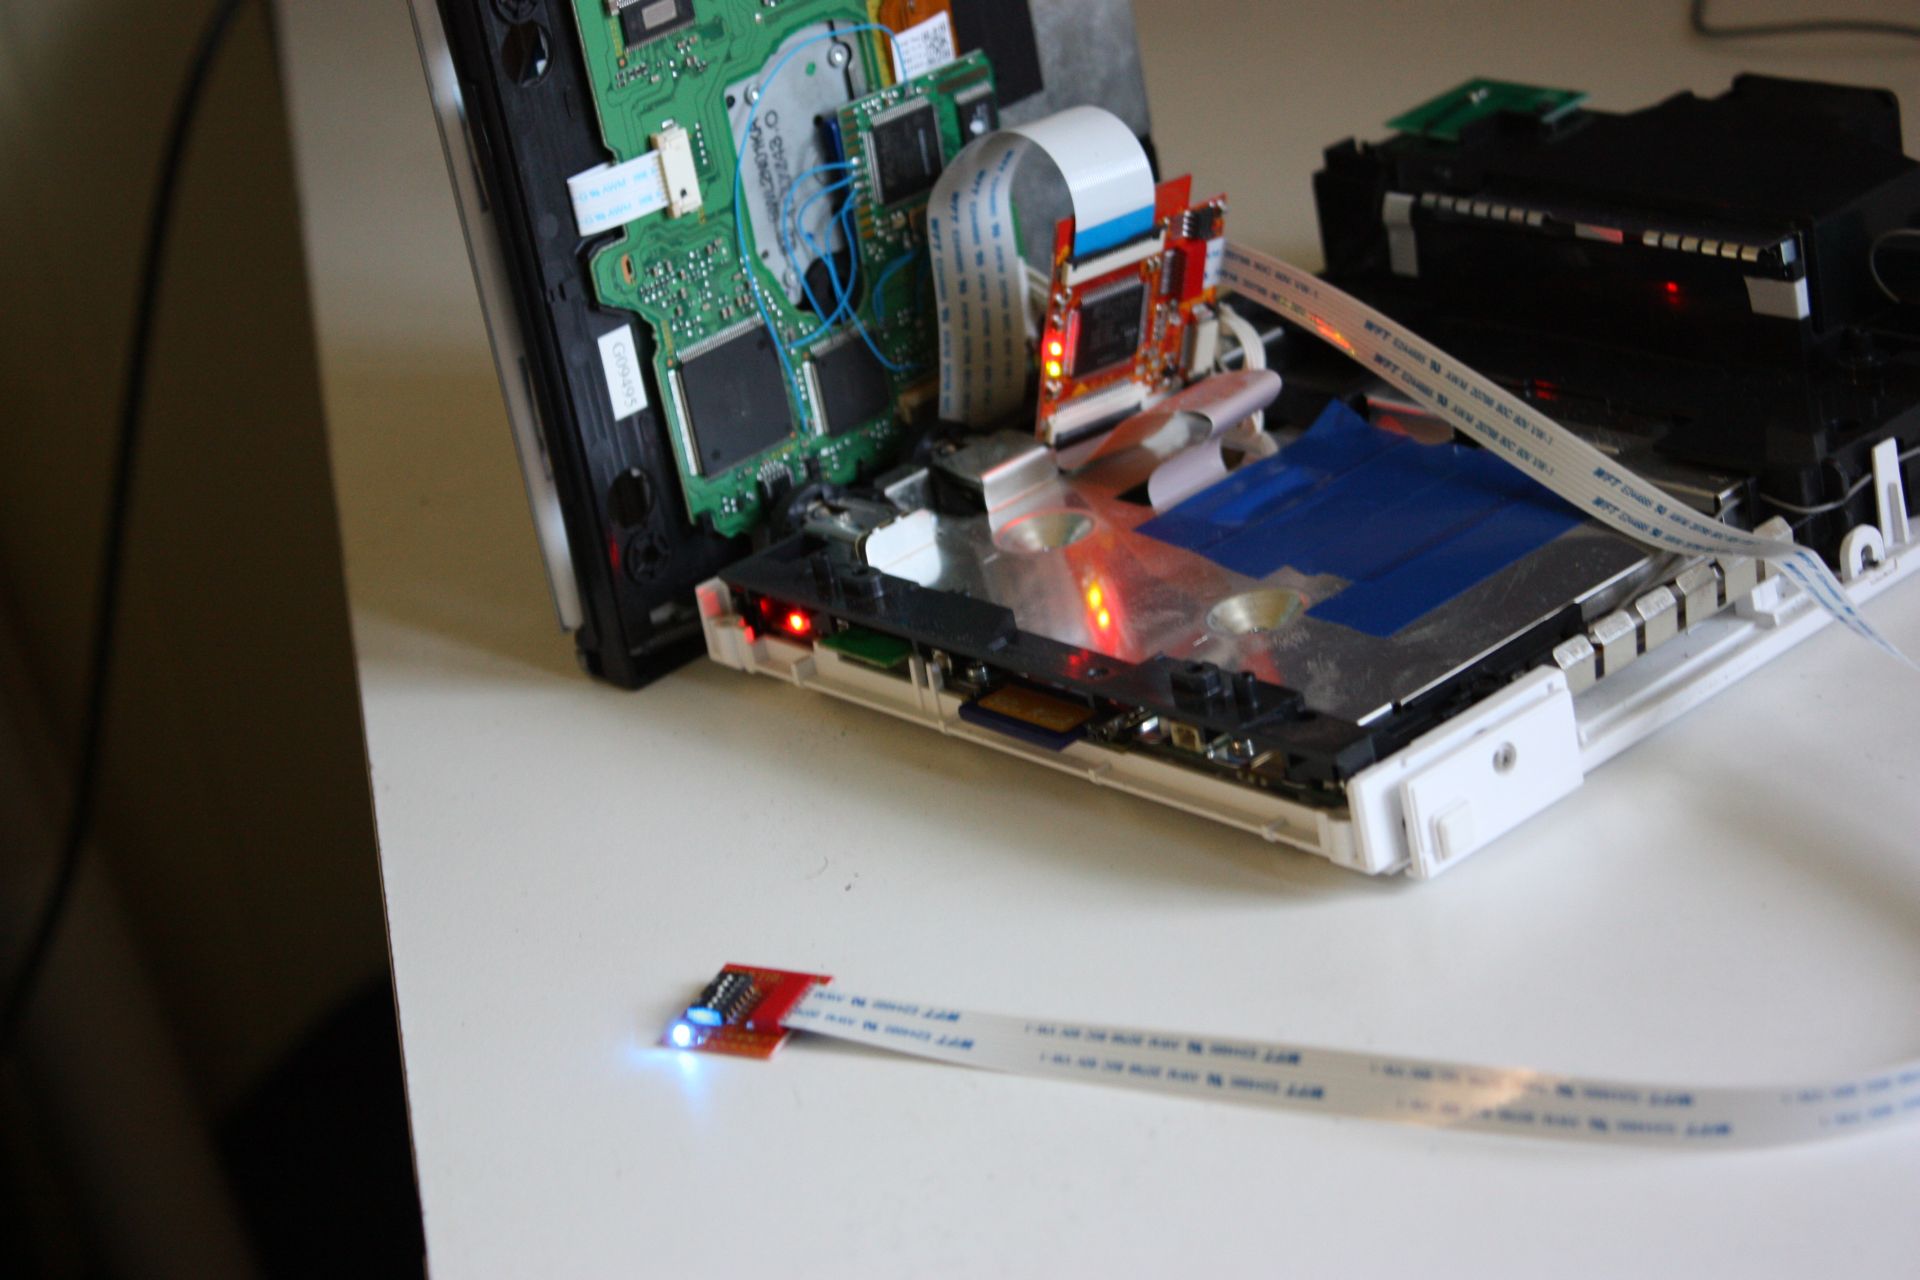
Requires 7 wires for installation on the D2A and the D2B, instead of 5, like most other chips.  Aside from taking an extra 30 seconds to install the 2  wires, one of which was a IC leg, it was an easy install.  The 
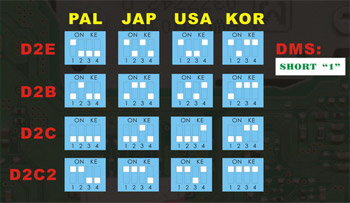
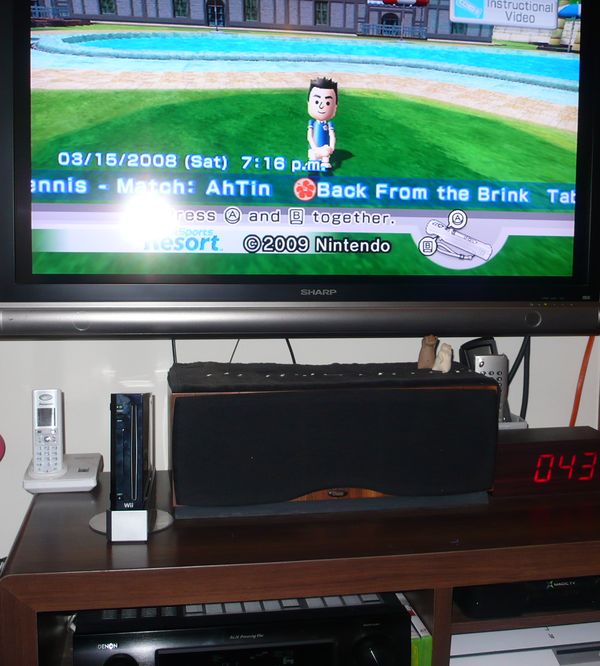
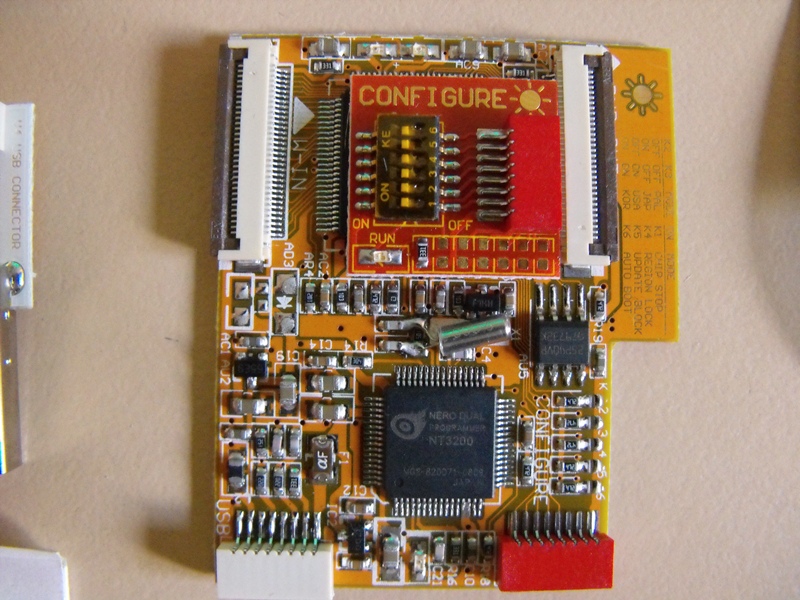
toggle switches were easy to change for my setup, and the chip booted up everything I threw at it, including the PAL imports I had laying around the house.  No change was noticed between the wire install and the Wii-Clip install.

D2B:

Installation was the exact same as the D2A, and worked just as well.  No change was noticed between the wire install and the Wii-Clip install.

D2C:

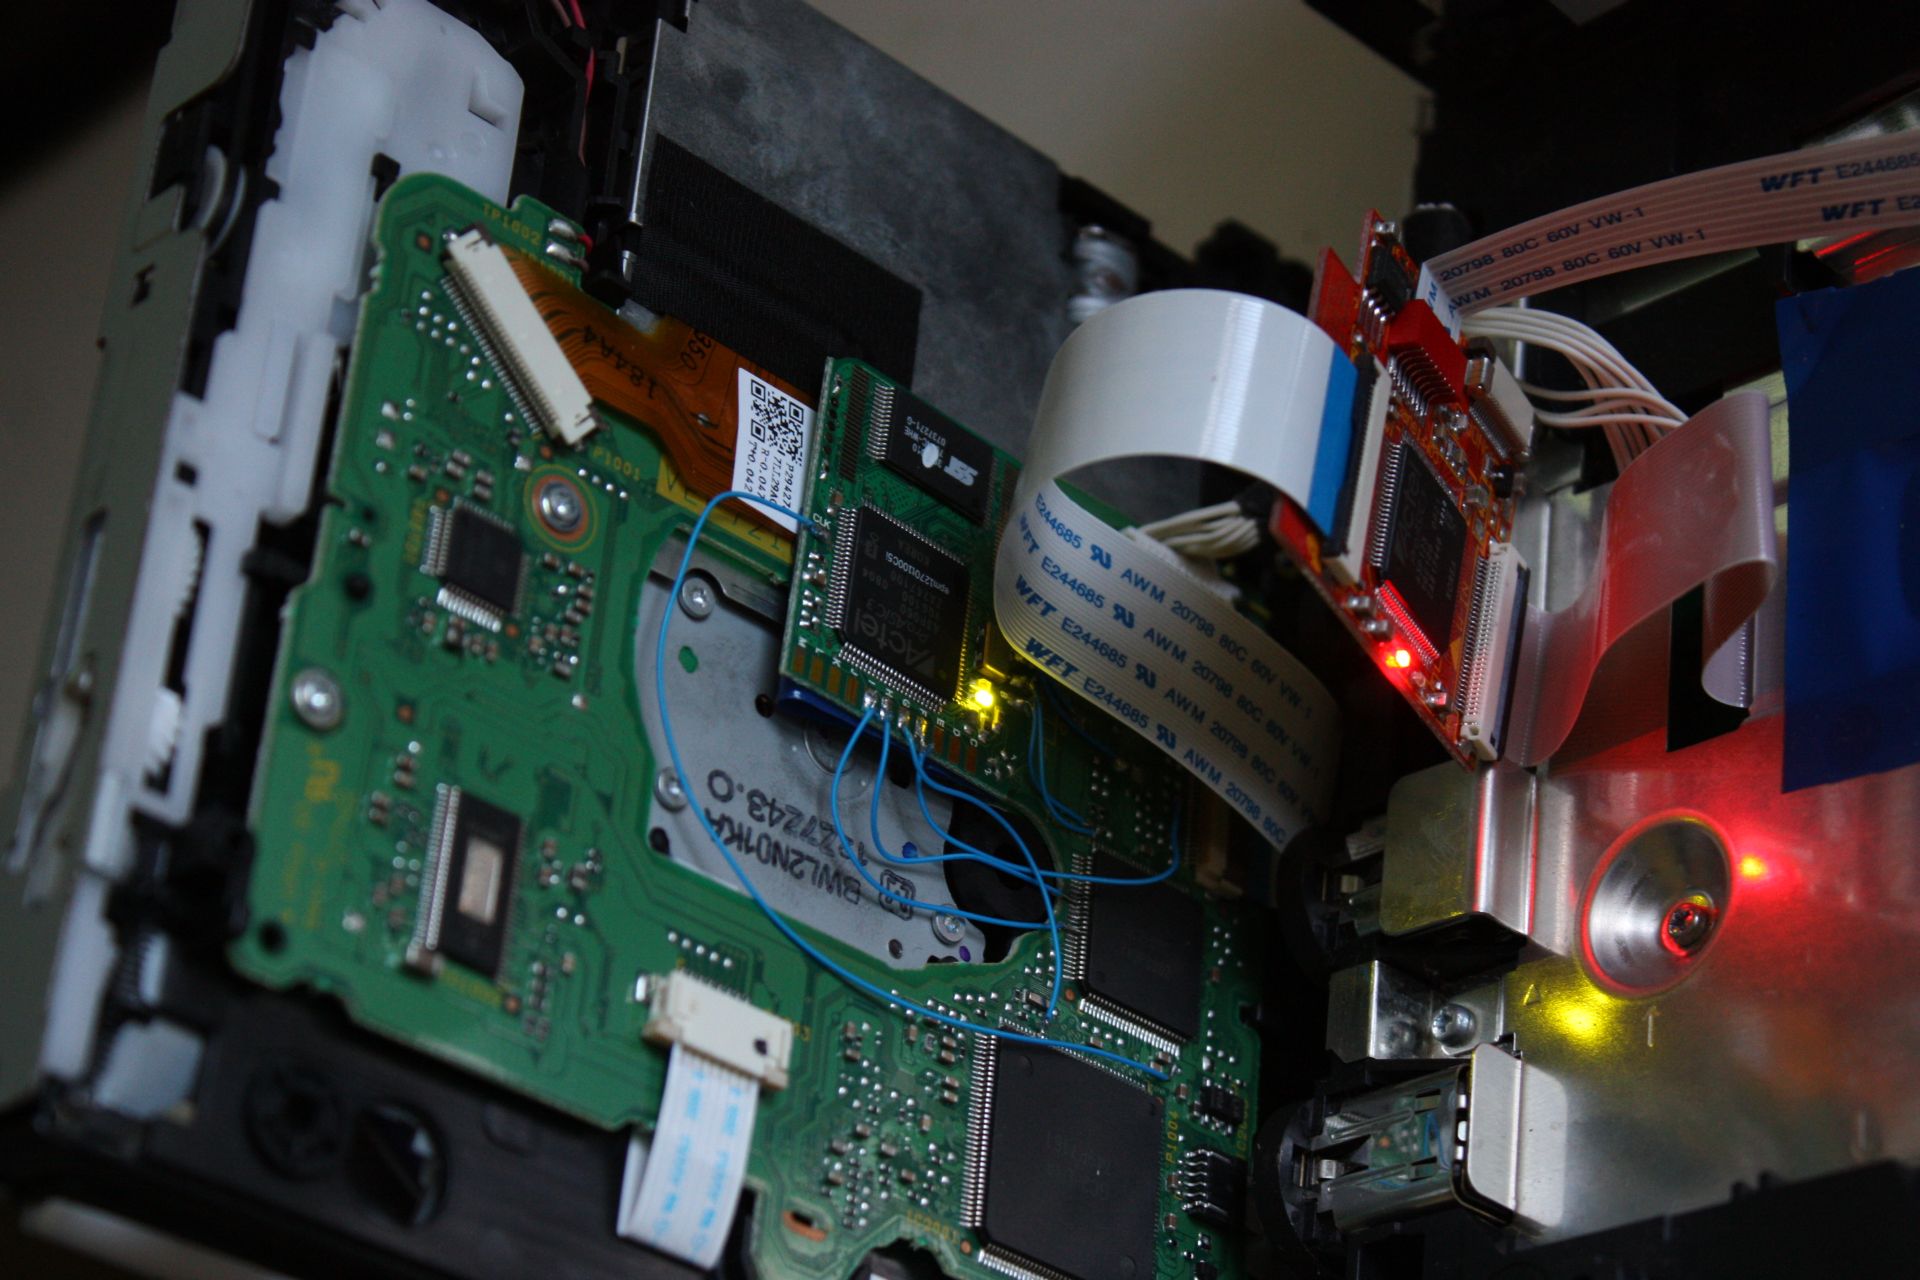
Installation was 7 wires, 1 of which was to an IC leg.  Initially, it wouldn't boot anything, until I realized I had forgotten to change the little toggle switches.  After that, it worked flawlessly, and the region free worked well.  No change was noticed between the wire install and the Wii-Clip install.

D2C2:

Same installation as the D2C, same initial mistake of forgetting to change the switches.  Once changed, it worked flawlessly.  The D2Sun stayed in this Wii.  No change was noticed between the wire install and the Wii-Clip install.

Final Thoughts  Grade A+
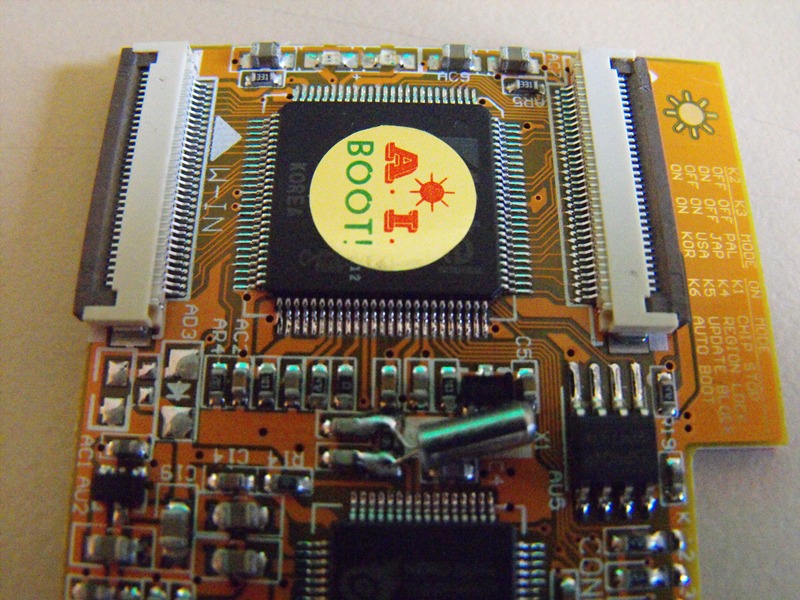
I really like this chip  Why?  It was heavy.  Really heavy.  Twice as heavy as most others.  For some reason, my mind relates weight with 
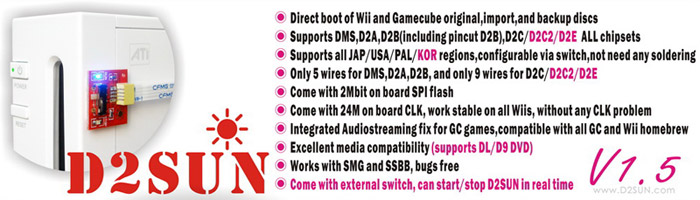
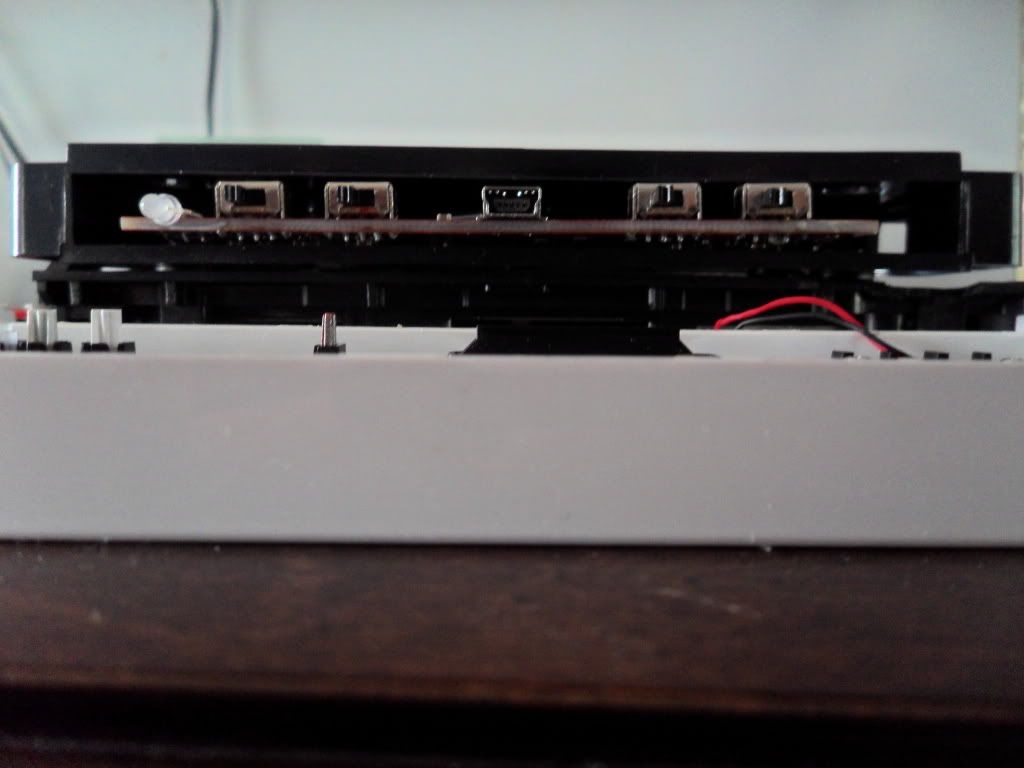
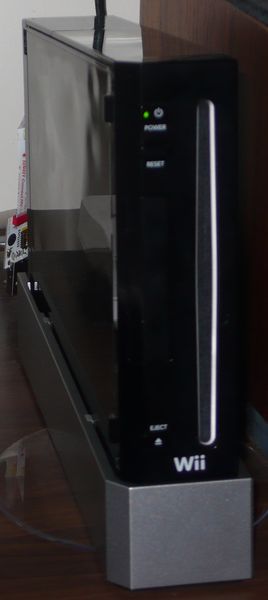
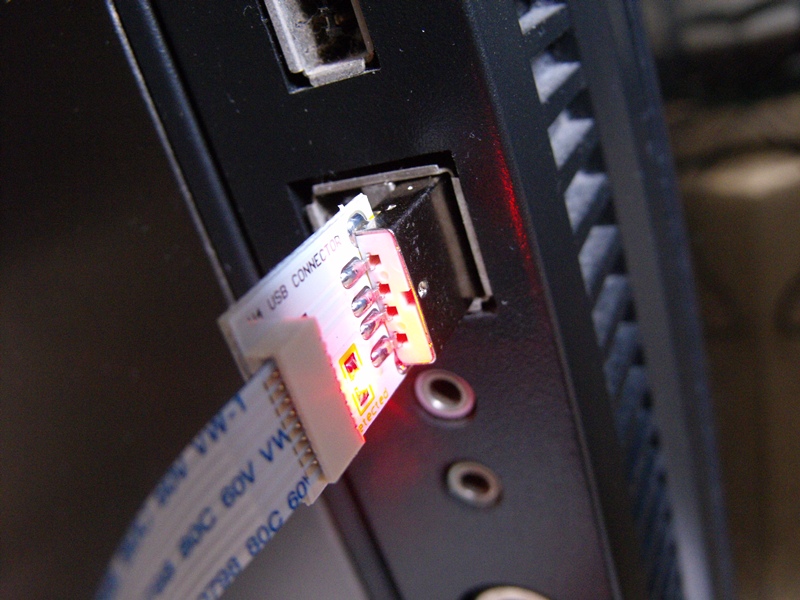
quality.    The D2Sun also includes an external switch that allows you to disable the chip and leds on it show the chip’s status.  I didn’t mention it during the install reviews because it does not effect overall performance.  As mentioned, they also included a Wii-Clip with my sample, which was greatly appreciated, though I doubt it comes in the standard D2Sun package.

I highly recommend this modchip


The review by modsupplier.com:

D2Sun v1.3a Features

D2Sun v1.3a Mod Chip For Wii

The D2Sun v1.3a is the latest chip from D2Sun team, it’s designed to be aimed at the installer market as well, the price on these chips is one of the lowest on the market while still holding on to great compatibility and quality in design. With the market for installs in D2C2 & D2E getting very aggressive, it’s important for installers to be able to offer slightly cheaper installs without compromising on function, so the D2Sun is our second edition to chips that installers should be happy using  while saving as much as possible on the final price. These latest v1.3a versions now also support the 7-wire install, so you can also save time by not having to do the full 9-wire install, we have tested out the 7-wire install on a D2E drive and did not have a single problem with any of the titles we tried booting, the good thing is if you do get a drive that might not like the 7-wire install, you can always go back to using 9-wires, but from our tests we really don’t think anyone will have to use the 9-wire method on these chips.

D2Sun is possibly the most popular chip for Wii coming out of China, while there are a lot of factories making chips or cloning other top end ones on the market, the D2Sun team have managed to produce a nice range of chips and prove they too can compete with some of the higher end chips but at a lower price. If you are an installer and in a competitive area, the price you pay for your chips can make or break you, so this is why we have started to offer these D2Sun v1.3a.

So far our tests on the D2Sun v1.3a have come up great, they boot all the titles we have tried PAL & NTSC, also the booting is really smooth, no laser squealing or drive clunking, they boot smooth first time every time, to be honest we were really surprised how smooth these chips did work, it looks like D2Sun team really have got their hardware and firmware right on these chips. We tested them in D2B & D2E drives and each boot was flawless. All region support was enabled from the start, there was no need to play an original game from the consoles region to enable all region support.

Un-like other D2Sun chips, these v1.3a don’t use the dipswitch method of selecting drive type and region and opt for bridging solder pads on the chip to do so, this is not a problem at all for installers and also helped them to reduce the cost of the chip. So far the D2Sun has gained a lot in popularity worldwide and we think soon it will be the installer’s choice for installs along with the Wizard for the slight less competitive markets. The D2Sun 1.3a is still using a high quality Actel IC which we all know goes a long way to stability and compatibility, so if you are an installer and looking to reduce the overall cost of your installs, check out these D2Sun v1.3a today!


Solderless D2Sun V1.5 Features

Here we have the Solderless D2Sun v1.5 mod chip for Wii, these chips are aimed at people that have a D2C2 or D2E consoles and want the cheapest possible solution for their console without compromising on quality or function. The D2Sun v1.5 is one of the latest chips from the team and one of the first noticeable changes is that they now include an external on / off switch like some of the other high end chips from this team. Note that you do not have to install this switch and it is an optional add-on. Another great use for this chip apart from D2E consoles is for people with D2B consoles with the legs cut, until now there has not been any solderless solution for them as the WiiKey would not work, so if you are the owner of a D2B with the legs cut, these Solderless D2Sun v1.5 will be a awesome solution as well.

The D2Sun team are possibly the most famous team exporting chips for the Wii from China, they now have a large range of chips that cater to different markets and have proven to be good quality and have high compatibility. We put these chips to the test before deciding to stock them, our tests showed the compatibility and function of these latest D2Sun chips was equal to the other big name chips on the market. We were quite surprised at how smooth these chips did boot every title we tested, there was no hesitation on any of the titles and the chip booted both PAL & NTSC perfectly, even the troublesome ones such as SSBB worked first time. All region support is on by default, there is no need to play an original game to enable all region support with these chips, just plug and play.

The setup of the Solderless D2Sun v1.5 mod chip is slightly different to that of the D2Pro or WiiKey chips, they have a set of switches that you need to set for your drive type and region, this is not really rocket science and if you are un-sure of your drive type or how to set the switches, you are welcome to email us and we will explain it in full for you, we have also added a picture below that shows you which position you need the switched for each drive type and console region.

Like we said above, these are great for people that have a D2E console and just can’t afford to go with the D2Pro, but don’t want to settle for something inferior in quality or function, we feel confident in saying that you won’t be disappointed if you decided to buy one of these D2Sun instead. These chips will also work in any Wii console no matter the region or drive type, so you don’t have to worry with these chips that you might be buying the wrong chip for your console, as they will work no matter what drive type you have. Buy the solderless D2sun v1.5 here today!


Powered by D2SUN Team 2010~2016